Search This Blog

24 December 2010

Pull-Aparts

Today, Christmas Eve, we are spending time with Pricklypear's family, watching movies, making weird food, and making our favorite -- pullaparts. We call them pull-aparts because they you pull them apart to eat them. Pretty clever name, eh? This is the only food tradition that we really have at Christmas and we eat them on Christmas morning. This year we ate them on Christmas Eve for dessert.
making the pull-aparts


Raw pull-aparts after rising for 30 minutes, see the cinnamon coating splitting?


There isn’t really a recipe. Motherdear always just used leftover bread dough of her whole wheat bread and dipped blobs of it in melted butter and cinnamon and sugar. I think the best ratio of cinnamon to sugar is 1:3, so 1 teaspoon of cinnamon to 1 tablespoon of sugar. The batch size we made today needed a cup and a half of sugar, which would need half a cup of cinnamon.


Baked pull-aparts, so yummy!!
This Christmas, I am very glad to be able to come see my family and eat fun food with them. I love them so much! Happy Holidays to everyone!

01 December 2010

More on Persimmons

My attempt at persimmon jam was pretty unsuccessful. My one week's worth of experience with persimmons failed to prepare me for how much they would not act like other fruits that I have canned in the past. Here is what the jars looked like, and yes, I know I could turn them upside down to mix them together more, but I want you to see how little fruit there is compared to gelled sugar. Pretty much the whole bottom half is sugar/pectin.


Here are some things I learned from this experiment:

1) Use very very ripe persimmons---I used some that were quite firm still, but they should be mushy so that if the skin is punctured the innards want to come spilling out (what a description!) and you can easily peel and mash the innards with very little effort. If they aren't ripe enough the jam will not be juicy enough and you will have half of it be gelled sugar without any fruit to speak of in it, like mine. Also the flavor of the less ripe persimmons is quite delicate and cooks right away in the 5 or so minutes it takes to get the mixture cooked enough for the pectin to set up. This is really hard because for most fruits, if they are this ripe you throw them away because they are rotting. This is why it would be nice to have previous experience with persimmons, to know how they act at different stages of maturity.

2) Add a fair amount of something acidic-like lemon or lime juice, or even citric acid powder-because the persimmons themselves aren't acidic enough to preserve correctly without it. I used lime juice and a little zest, and at the end that was all I could taste in the jam. Next time I will do citric acid, I'll just have to figure out how much.

3) Start with one batch, don't commit to more than one until you have fine-tuned the recipe, or until I fine-tune it for you :)

Today I found some extra mushy persimmons at the market and I rushed home to taste them. They are a strange fruit, they taste delicious this way, but they have an extra weird texture. Kind of slippery, like raw fish. Now I understand why they are typically turned into pudding instead of eaten raw and fresh. The texture is just wrong for eating this way. But I saw a couple of recipes briefly at the library today, one for ice cream and one for quick bread, and a reference to a fresh persimmon pie, that sounds delightful. I think I'll be experimenting with these lovely mushy ones. The one on the right is not ripe yet, and I think you can see the difference. And you can see the insides, all shiny and soft.


22 November 2010

Snow Day in Wyoming

I'm in Wyoming, visiting the Motherdear. We got a lot of snow in the last two days, this is how it looked on the first day of snowing, and there is even more snow coming tomorrow.


It was a great time to work on making pies for Thanksgiving, an apple and a cherry lattice pie, aren't they pretty? The cherry filling is from a can, to make it easy, and I'm pretty impressed with the vents I cut in the top crust of the apple, usually they don't look as neat or as well-centered.


I made extra apple filling, but not enough for a whole pie, so I made a cute rustic tart sort of thing that I didn't get a picture of before we demolished it, but maybe in the next picture of the half that is left you can see how flaky and delicious the crust is and how melty the apples look. And of course, the remainder is going to be breakfast tomorrow. My favorite! And if you want to see the other projects that were good to work on for a snow day, go to www.flickr.com/sizzle04


10 November 2010

Persimmons and Privacy

Last night I had this terrible dream that someone had found old information including pictures of myself and my husband from years ago from this blog and from blogs of old friends and they started writing their own little blog, dissecting our home life based on very little evidence, and they somehow hacked into my account to put up links to it from this blog to make sure that I and everyone I know saw it. It was very distressing, I had a hard time getting to sleep again. I decided to take it as a warning, and now I will be using nicknames for myself and my husband and anyone else I know to protect the privacy of everyone. From now on, my husband will be called Lovemuffin (heehee!) and I will be called Pricklypear and if you want your own nickname, let me know (privately, of course) and we will go from there.


Now that the official business is out the way, I have to tell you how excited I am for these crazy fruits! I knew they existed, I think my Grandma made a persimmon pudding one time, but until 3 days ago I had never eaten a fresh persimmon. They are super cheap at a produce stand in downtown PG, so I bought about 10 pounds, and I'm going to do some experimenting. I'm thinking I'll make a persimmon pudding on Sunday to feed some guests that we'll be having over, and today I'll try to make some jam. Why is there a banana in this picture? I'm trying to get them to ripen faster, to make sure that they'll have the correct amount of natural pectin. I have never seen persimmon jam, I'm not sure if it's possible, but I found a few recipes online that seem interesting. I will let you know how it turns out.

28 October 2010

Peanut Butter Caramel Cookies

These cookies are awesome. I stole the recipe from my mom's recipe book, I think she got the recipe from someone from church a long time ago. We only made them a couple of times, and they were unbelievably delicious every time. They look like boring drop cookies on the outside, but when you open them up, there is a delicious ooey-gooey treat in the middle.


Here is the original recipe as written by someone named Marlo Carter:
Peanut Butter Caramel Cookies
1/2 cup butter
1/2 cup peanut butter
1/2 cup white sugar
1/2 cup brown sugar
1 egg
1 teaspoon vanilla
1 1/4 cup flour
1/2 teaspoon baking soda
1/2 teaspoon salt
24 Rolo candies

Cream together butter, peanut butter, white and brown sugars, add egg and vanilla, beat until smooth. Mix in remaining ingredients. Chill dough at least 15-20 minutes before forming. This will give you time to unwrap the rolos and preheat the oven to 375.
Roll a tablespoon of dough around one Rolo, shape into a ball completely enclosing the candy, roll in white sugar if desired. Bake at 375 for 7-10 minutes. Makes 24 cookies.

Here's the amounts I used today to make a double batch:
1/2 cup butter
1 cup peanut butter
1 cup white sugar
1 cup brown sugar
2 eggs
1 teaspoon vanilla
1 1/4 cup all-purpose flour
1 1/4 cup whole wheat flour
1 teaspoon baking soda
1 teaspoon salt
approx 1/8 cup milk
approx 50 Rolo candies
And I baked them for 11 minutes.

As you can see, I did not double the amount of butter, which is why I use a little milk - a trick I also borrowed from my mom. Add just barely enough milk to make it the correct consistency. The smidge less butter as well as the wheat flour are there to make you feel a smidge better about eating them, because you will eat a lot of these right out of the oven.
As I was forming the cookies, I was wondering if there is another way to form these, instead of wrapping it up entirely with dough, but then one of the cookies leaked while it was baking and I was glad that I did not experiment with different styles of cookie formation with a whole pan full.
Here's some more pictures to make you want to get door-bell ditched by me this Halloween.


20 October 2010

Crepe Party

I made some crepes the other night, my crepe pan is well seasoned now and I have the technique down, so it was kind of a party. The savory crepes for dinner were delightful and surprisingly filling. I used the recipe for blintzes from Mark Bittman's "How to Cook Everything Vegetarian" and they were very sturdy and hefty, as you can see in this picture. You can use any tried and true crepe or blintz recipe.


Savory Crepes For Dinner
1 onion, finely chopped
about 10 mushrooms, finely chopped
1 clove garlic, finely chopped
1 10 oz. package frozen spinach, thawed and drained
3-4 oz. mozzerella cheese, shredded or diced
2.5 oz. parmesan cheese
salt and pepper to taste
10-12 crepes or blintzes, already cooked

Saute onion, mushrooms and garlic till soft, let cool somewhat. Mix with well drained spinach, cheese and spices. Place about 1/4 cup of filling on the crepe and roll it up burrito style. Place all of the rolled crepes in a casserole pan in a 350 F oven for 10-15 minutes, until the cheese is melty, then serve. Or you can just keep the filling very hot when you prepare it and everyone can roll up their own.


And I made sweet crepes for dessert/breakfast the next day with cottage cheese and berries and a dash of sugar. You don't really need a recipe for this one.


07 October 2010

Pumpkin Bread

I made this pumpkin bread from Nancy Silverton's book "Bread from the La Brea Bakery." The book is very cool because all of the recipes use a sourdough starter, and that is just what I need. I will probably be purchasing this book, so I have more resources for keeping my starter, Harriet, occupied. Anyway, I thought I would share the pictures because it turned out so great. I don't think I can share the recipe, because that might be a copyright issue because I did not alter it at all, I'm not sure what the rules are. You can see the pumpkin seeds in it, and the lovely orange color of the mashed yams, and the way I even managed to score the top of the loaf in the manner indicated in the recipe. I don't usually follow the recipe this closely, so I'm quite pleased with myself.


07 September 2010

Pear/Ginger Upside-down Cake


Every year at pear season I experiment with a pear and ginger cake recipe that I saw in a random cookbook from a craft store, and I couldn't get it to work like it looked in the picture. Somehow these people made a thick-ish batter and set pear slices on top and after baking the pears were still on the top of the cake. When I tried it the pear slices sank to the bottom and it wasn't very impressive. So then I tried a few mutations on the theme, trying to perfect a recipe (pear-fect, ha ha) to get the most flavor into the cake and make it beautiful. I've tried making a pound cake in a bundt pan so that the pears in the bottom of the pan will end up on the top when you take it out of the pan and it should be pretty, but it wasn't as satisfying as I thought it would be. And then I was talking to my dad a few days ago, telling him my plans for the hundred or so pears that I had getting ready for jamming, and I told him my dilema, the elusive cake recipe. He suggested doing it like a pineapple upside-down cake, because it's easy to find a trusty recipe. I tried it last week, and somehow this gave me the most flavor bang for my buck, and I think it looks pretty good. So, thanks Dad! This one is for you.

Pear and Ginger Upside-Down Cake
(Adapted from the Better Homes and Gardens New Cook Book, 11th edition.)

3 firm pears
1 tablespoon finely diced fresh ginger
1/3 cup packed brown sugar
1 tablespoon butter
1 1/3 cup all-purpose flour
2/3 cup granulated sugar
2 teaspoons baking powder
2/3 cup milk
1/4 cup butter, softened
1 egg
1 teaspoon vanilla

Peel, cut in half, and core the pears, coat with lemon juice as needed to keep them from browning while you work. In a skillet over medium high heat, lightly cook the pear halves with about 1 teaspoon of the chopped ginger until they are a gentle golden brown on the outside. This step is important for fresh pears to soften and cook them a little, as well as infuse them with the ginger flavor, but if you can't find good fresh pears (a struggle, I know) and opt for canned pears instead, you can skip it.
Grease a 9-inch cake pan, mix together the brown sugar and tablespoon of butter, sprinkle over the bottom of the pan. Arrange the pears, cut side down, on top of the sugar, and sprinkle the remaining ginger over all.
Mix together the flour, granulated sugar and baking powder in a medium size bowl. Add milk, the 1/4 cup butter, egg, and vanilla. Beat with an electric mixer on low for about a minute. Spoon the batter over the fruit in the pan.
Bake in a preheated 350 oven for 35-40 minutes until  a toothpick comes out clean. Cool for about 5 minutes on a wire rack, then invert onto a plate and serve warm. Eat any leftovers for breakfast tomorrow.

04 September 2010

Jamming Time

Pears were on sale last week for really cheap, so we bought at least 30 pounds of pears and I made a lot of jam yesterday and today, and now I have a strange callous on my hand from paring so many pears. I did a bunch of pectin-free batches, and I did about 4 batches with the kind of  pectin that uses less sugar. It all turned out well. The first couple of batches made with pectin set up really hard, I think because the pears were less ripe at first. I let them sit with a banana in a warm place for a day before doing the next ones with pectin. The pectin-free pear jam, unlike the pectin-free boysenberry jams I did a couple months ago, turned out a little more like syrup than jam, although some of the pectin-free jams set up more, depending again on the ripeness of the fruit. I was really excited to do some fun flavor combinations because pears are nice and mild and like being eaten with all sorts of spices. I have been planning on doing pear and ginger for a while, it's a combination that I experiment with every year during pear season (see my pear and ginger upside-down cake, recipe coming soon!). It is delicious, but the other combination I tried was even better: pear with cardamom. It is like heaven on a piece of toast, on a hotcake, mixed in with your oatmeal for breakfast, and probably warm over vanilla ice cream. I can't give you the recipe because I think I might start selling it. Yes, it is that good.

In the picture from left to right: Pear with cardamom and other spices, Pear with ginger and cardamom, Pear with ginger.

20 August 2010

Mark Bittman's Layer Vegetable Torte

I just love The Minimalist. I made this vegetable torte tonight, and it was magnificent! I used a Greek cheese called myzithra instead of parmesan, and it was pretty good, but next time I will just use parmesan. I had thought about using some onions too, but when it came right down to it, I forgot. It happens a lot. I stuck the veggies under the broiler to cook them instead of on the grill, that is easier for me. We ate it with mashed potatoes. My pictures aren't very good tonight, but check it out:

Pizza Dough with Sourdough

My sourdough starter experiment turned out well. It is very active and happy, and I have named it Harriet. I am still figuring out how the best schedule for feeding and learning how to use it. I don't love sourdough breads, so this is kind of a weird experiment for me. But it's all about learning, right? I have done this pizza crust a couple of times, and it worked really well. It is adapted from "The Bread Bible," by Rose Levy Berenbaum. The hardest thing about sourdough so far is knowing how long to let it rise. The first time made this I mixed up the dough at about 11 AM and made the pizza at 5 or 6 PM, and it had not doubled, but was light and fluffy enough to spread right out on the pan and it made a beautiful crust. The second time I made it I tripled the recipe and let it rise once overnight and it definitely doubled, then I split it in thirds and put each piece in seperate bowls in the fridge during the day and pulled them out about 1 hour before (we meant to take it out even earlier but forgot) and it rose only a little in the fridge, and it was hard to spread it out when the dough was cold, so I would not let it rise in the fridge again. And I of course used my new scale, and this size batch makes just enough for my 14-inch pizza pan.

SourPizzaDough (or PizzaSourDough)
100 grams starter
176 grams flour (I used some all-purpose flour and bread flour)
100 grams water
1 tsp. salt
1 tsp. sugar
approx. 20 grams olive oil

Combine starter, flour, water, salt and sugar. It will be sticky and messy and crazy. If you find it unmanageable, let it sit for 10-20 minutes, then try kneading and folding it a little more. Scoop the dough into a clean large bowl and pour the olive oil over the top. Cover with plastic wrap and let it rise for a few hours. I find it helpful to fold the dough over itself to incorporate some of the oil after an hour or so, to make the dough smooth and easy to handle. When you are ready to form the crust, pour any more excess oil from the dough bowl onto the pizza pan and smear it around. Plop the dough on top and gently spread it out. Top with your favorite toppings and bake for about 20-25 minutes until the cheese is melty and toasty and the crust is brown on the bottom as well as the outside crust.

Fruity Yogurt: or some ideas for using the sweetened condensed milk you opened by mistake

A few days ago I needed some milk for a recipe, and didn't have any regular milk, so I went to my trusty pantry and opened a can of what I though was evaporated milk, so that I could dilute it to make it regular milk, but as soon as I opened it, I realized my mistake, it was sweetened condensed milk. So I dumped it into a jar and put it in the fridge and found a can of evaporated milk and went on to do my thing.
I had to think for a few days to figure out what to do, it would be such a shame to waste sweetened condensed milk, something I hardly ever buy. I though of making dulce de leche, but I'm afraid of explosions, and I don't know exactly what to do with dulce de leche. I remembered this thing we had from an asian bakery/cafe that was sort of like a slurpee, but it had chunks of mango with shaved ice and sweetened condensed milk drizzled over it, it was very yummy, but there were not any mangoes at the grocery store. And then this recipe that looks like Almond Joy candy bars caught my eye as well as this other candy, called brigadeiros, from Brazil, but both of them seem way to sweet for me to handle right now. I will probably still make the almond joy things sometime, but do them the same as I did my macaroons, with unsweetened coconut. And then I saw this recipe for 
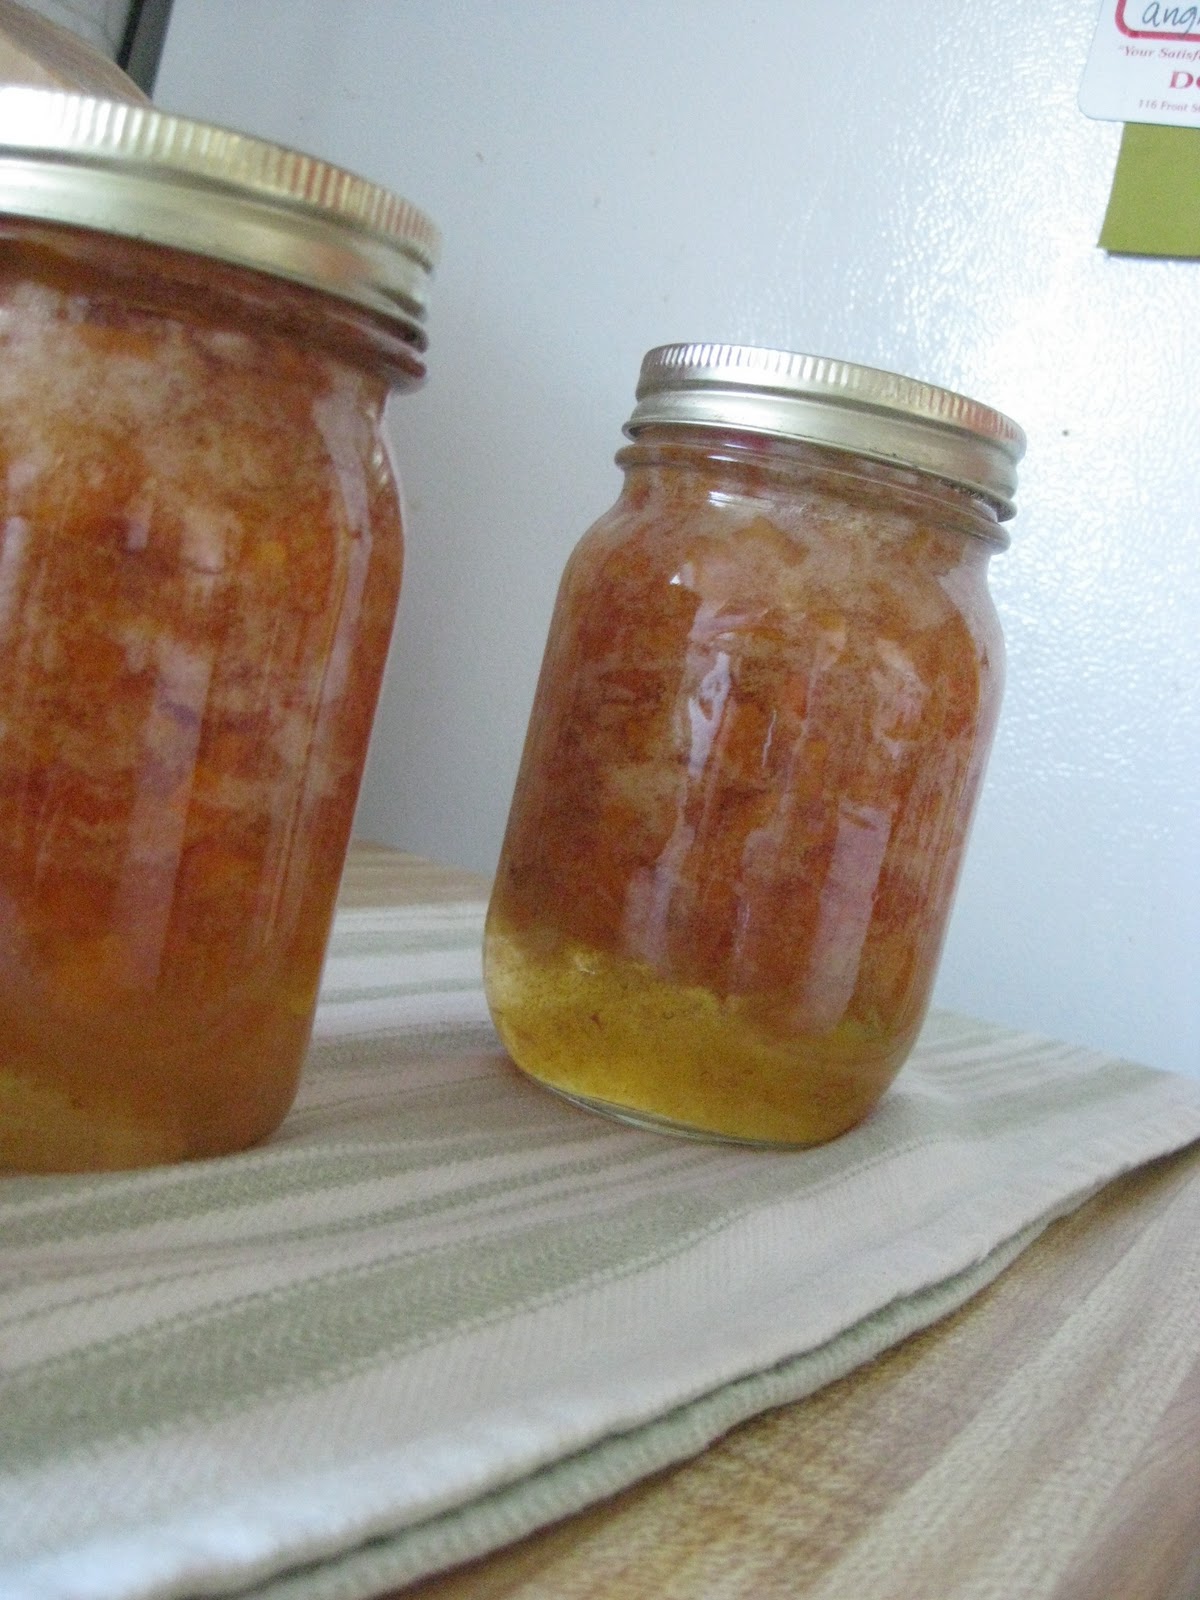
vietnamese yogurt, and it is the solution to (almost) all of my problems. Lovemuffun and Pricklypear both eat a lot of yogurt, and I am always fighting with the Lovemuffin because he eats his with a ton of jam, the jam that I made all by myself, and then there is never enough jam or yogurt for me, which frusterates me. So, here's what I did:

Fruity Yogurt
1 Large tub of plain yogurt with no added weirdness (no gelatin or corn starch for thickening)
1 Bag of frozen fruit of your choice
Some sweetened condensed milk, to taste (I used about 1/4 of the can)

Drain the yogurt over a sieve lined with cloth or just a paper towel. Let it drain for several hours till the yogurt is nice and thick, like greek style yogurt. It is nice to have it thick because the fruit will add more fluid and this is an easy way to keep it from turning into drinking yogurt. Unless you want drinking yogurt, that is okay with me, this is a very flexible recipe. Thaw the frozen fruit while the yogurt is draining, then blend the fruit up a little, so that it is chunky, not too fluid. Add the fruit to the drained yogurt, and add sweetened condensed milk to taste. You could, of course, just sweeten your yogurt with sugar, but where is the fun in that? Also, I think that would make it runnier, because of the way sugar pulls the juice out of fruit.
This large batch will last us about 3 days and I like it so much more than the pre-fruited and sweetened yogurt at the store. You can make it the level of sweetness you desire, and you can be sure that there is real fruit in there, not just artificial colors and flavors. So far I have used blackberries and a fruit medly containing strawberries, blueberries and blackberries, and I still have plenty of sweetened condensed milk. Up next is peaches.

12 August 2010

The Experiment Update: Some Failures and Successes

My sourdough starter is very happy and active. It's name is Harriet. I'm still learning how to use Harriet effectively, how to make bread with only the starter and no added yeast. I've been sifting through recipes on one of my new favorite food blogs, http://www.wildyeastblog.com/, trying to learn some new techniques and recipes.

The first thing I tried was this recipe for sourdough English muffins and it worked all right, but they tasted like baking soda, which  made me wonder if the baking soda is added to the dough to help it rise by reacting with the acidity created by the wild yeast and bacteria in the starter and if my little Harriet was not well developed and sour enough yet to use. Or maybe they're supposed to taste like that, but I don't think so. They look nice though, right? Later I tried another batch where I reduced the amount of baking soda, and used a little baking powder to make up for it and this second batch didn't get as puffy on the griddle as the first ones, but they did not taste yucky either.


My next attempt was a pizza crust adapted from the recipe in "The Bread Bible" that I brought to a friends house. I made it somewhat later in the day than I should have, and I was just hoping it would be able to rise and develop enough in the small amount of time I gave it. It turned out very delicious, with a great texture and flavor. I was very impressed. I'll be putting up that recipe soon. This is what the leftovers looked like.

Next, I tried making a couple of small loaves using the 1:2:3 method from Flo Makanai. I used whole wheat flour and bread flour, and I made a large batch because I thought I wanted to make some to give to some friends too. The dough was hard to work with. The night before baking, when I was kneading the dough, I thought it was going to be fine, it was smooth and not sticky the way I thought it would be. I let it rise overnight because I think the starter often needs more time to work than regular yeast. In the morning when I attempted to form the loaves it was sticking itself all over the place causing me all sorts of irritation. Then I was impatient and probably didn't let the first loaf rise enough before putting it in the oven, and it turned out deformed and weird. And a little undercooked. I cooked the next loaves for longer and they were a little better. The Lovemuffin says they tasted like sourdough, and that is something, but I did not like the way they tasted. I figured I just don't like sourdough, and wondered why I thought this experiment was a good idea, and then remembered that it is about learning something new. Not about being perfect.

And now I'm trying this sourdough recipe (also from wildyeast) and it has been a little easier. Although I made a mistake in the evening when I was feeding my little Harriet to make enough starter for the recipe plus some to save to keep feeding, and I discovered this morning that I was 20 grams short of starter. I figured it wasn't a big deal in the grand scheme of things, and continued on as directed. And I think the loaves are wonderful! They rose just fine, but then I had a hard time forming them because I'm terrified of deflating them too much. But they tasted delicious, not to sour and tangy, not weird like the rye flour, just perfect! This might become my go-to recipe for using up Harriet.

Also, I just found this incredible video about making croissants and pastries. You should check it out.

20 July 2010

Tomato Thievery

The tomato plant has slowly been getting some fruits, they have been ripening very slowly. One was finally ready about a week ago. I picked it and ate it before I could even get in the house. It was delicious. I got so excited to have a big harvest. There were at least 4 more that were about 7-9 days from being ripe and ready. You see where this is going, right? This morning they were gone. Gone. I am furious. Someone stole my almost ripe tomatoes. Tonight I taped a little sign on, reminding anyone that they are MY tomatoes, please don't pick them. Hopefully it was just the landlady's grandkids, confused about whose tomatoes are whose (she has a plant too) and not  some malicious force that will try to steal the one ripening bell pepper as well. Grrr.
I do have a few things to console me, however. Firstly, my sourdough starter seems to be active. It doesn't grow very much between feedings, but it is perceptable and I think it does have the right smell now, so I'll keep at it. Secondly, I have some peanut butter cookie dough in the fridge that will be eaten tonight, baked. Thirdly, my bread from the other day is still delicious. So there! Take that, world! You can't get me down!

19 July 2010

A Success! And an Epic Failure or Two

I made some bread, the Basic Hearth Bread recipe from "The Bread Bible" using the measurments by weight instead of volume. At first it didn't seem very different, the 156 grams of flour was about equivalent to the 1 cup listed in the other column, and so on. But I persisted. I'm trying more to follow recipes exactly, it has never been my strong suit, but I believe that I will be better at freestyling my recipes if I know the rules first. I've wanted for a while to try to make bread using certain ratios of flour to water, to see how they turn out differently, and now with my new scale, I can.
The bread turned out so well! It has a fabulous crusty exterior, and a magnificent crumb, with perfect size bubbles. Oh, and it tastes so delightful! I wish I had my camera so I could show you just how amazing it is. You'll just have to believe me, I've already eaten half of it. I am absolutely astounded! Especially considering this the other things that have been going on, not working so well.
The other night I tried making agua fresca with the melon I bought that was mostly tasteless, thinking that if I add a little sugar to it, it will tasted great, but no, it did not. Then I added yogurt to it, maybe it needed some zing and sourness, but no, that was still not so good. So then I thought I would freeze it, try to make melon frozen yogurt. And that did not work very well either. It all went down the drain the next day. That was my Epic Failure.
The other thing that is disappointing lately is that my sourdough starter has pooped out. I thought it was trying to rise a little bit, a couple of days ago, but now it isn't doing anything, but it smells nice and sour. I'll give it a few more days. Who knows, it may still take off.
In other news, I have been sitting on a rolly chair in the kitchen, rolling around with my feet tucked under me so my toes don't get cold and my feet don't get tired. Walking is for suckers. I can roll to the garbage to throw something away, I can roll to the sink to put in my dirty dishes. It's great.

14 July 2010

Some Thoughts, New Stuff, and an Experiment

Thoughts:
I just applied for a new job, could everyone reading this send some good vibes my way? I'm sure I can do the job, and pretty sure I would like it more than my job now. I'd probably get paid more too. So start rooting for me!! :)
I love candy bars, and I just noticed the the price is really going up (10 whole cents! 99 cents for a candy bar!) which seems like a real shame. Is it the economy? Is it inflation? Is it temporary and will be back down in a week? I guess I'll just have to be better than ever about buying them when they are on sale, buy one get one free, or 2/$1.
The Lovemuffin is out of town for a couple of weeks, and I have to feed the missionaries on Thursday all by myself. The sister from Korea said "we will eat everything" (I think she meant "anything," second language, you know) What on earth should I make? I'm kind of thinking quiche with something crazy like artichoke hearts and fennel, something like that. I learned how to make quiche from a guy that I worked with, and I haven't tried it at home yet. Or maybe I'll just get a huge Papa Murphy's pizza. Any ideas? Let me know.
There are finally some tomatoes ripening on my plant, they are very pretty and I hope it keeps doing well. The one big pepper on my bell pepper plant also looks like it is ripening, I'm very excited. But my zucchini plant is pretty much dead. I thought it might recover, it looked like it wanted to produce more fruits, but the leaves are shriveling up and I just don't think it can support itself anymore. Oh well.

Some Stuff:
For my birthday I treated myself to a trip to Sur la Table; I bought a kitchen scale, a pastry cloth/rolling pin cover and a new pastry brush. Our last silicone pastry brush got lost in one of our moves and I've been missing it. The pastry cloth was kind of an unnecessary splurge, but I'm interested to see if it makes it easier to roll out pie crusts. I also might try to do a strudel. But the scale, ah, to have a kitchen scale. Now I can make things from this book, that only gives measurments by weight. I'll have to check out "The Bread Bible" (Rose Levy Berenbaum) and "The Bread Baker's Apprentice" (Peter Reinhart) from the library. I've never read "The Bread Baker's Apprentice." It looks intimidating. But I think they both give recipes and talk about making breads by weighing ingredients, and how you can get more consistant results and do some interesting experiments by changing the ratio of water to flour. I'm very excited.

An Experiment:
I am trying to make a sourdough starter using my brand new scale (hooray!!) and these instructions. I'm not sure if it's working. It's pretty stinky right now, and it looks like it is rising, but both of those things could be from the bacteria that likes to live in it before the pH changes and makes it not habitable for bacteria. I wonder if this is really a good experiment for me, because I don't even like sourdough bread. But I think it can be made more or less sour, depending on the temperature that you keep it at. I'll have to read up on balance between lactic acid and acetic acid. It should be nice to have a 100% hydration starter, because you can maybe use it in all sorts of things, like this chocolate bread. Hopefully it works and isn't too yucky.

02 July 2010

More Pie!

In case you haven't noticed, pie is one of my favorite things to make and eat and share with friends, as well as just look at and read about. I used the leftover berries from my berry pickin/jamming adventure to make a crazy delicious pie. I used boysenberries, olallieberries, and blackberries. I learned a trick from my grandma to use tapioca to thicken the juices instead of flour or cornstarch. It's a little funky, but it works well and is good because it doesn't have the yucky cornstarch or raw flour taste.

Berry Pie
pie crust dough for 2 crusts or enough for a bottom and a lattice top
4-5 cups berries of your choice, fresh or frozen
3/4 cup sugar or more, if you like it sweeter
lemon zest from one lemon, or less as you like it
2 teaspoons lemon juice
1/4 cup instant tapioca pearls

Roll out the dough and place in the pie pan, trim the dough so that a little of it overhangs the pan, a little less than an inch. Keep the dough well chilled. Roll out the dough for the top half or the lattice, keep it chilled as well. Mix together 3 1/2 or 4 cups of the berries, sugar, zest, juice and tapioca pearls together, pour into the pie shell, and top with remaining berries, as much as you want, but don't overfill it. I just discovered that it is nice to have extra whole berries to put on top that aren't disintigrating because of the sugar and the stirring, it makes it look really nice. Arrange the top crust, cutting vents, or make the lattice top. Fold the excess dough under itself, and crimp the edges. If desired, you can brush the top with milk and sprinkle with a little coarse-grained sugar, to make it extra pretty and sparkly.


Bake at 425 for 40-50 minutes, until the filling is very bubbly and the crust is toasty brown. Check the bottom crust if you are using a glass pan, it should be brown and cooked looking as well. If the bottom isn't cooked, but the top crust is getting too brown, you may want to make a foil tent or rim to put over it, well vented, and let it bake a little longer. No one likes a soggy doughy bottom crust. When the pie is completely cooked, try to not devour it right away, let it cool so that it can set up. Get together with friends and serve with a nice French vanilla ice cream if desired. Eat the leftovers for breakfast.

01 July 2010

What do you do in the Summertime?


Pretty much every summer that I can remember my mom has made jam and I helped. Sometimes we find a great deal on some fruit, so we buy a ton and make jam like crazy for a day or two. It's great. Last year my mom and I picked apricots from Lovemuffin's grandma's tree, and we made seventeen batches of apricot jam. It was pretty incredible. We're still eating it. Lovemuffin's cousin also made a couple of batches, she tried a recipe that didn't call for pectin, so it needed less sugar and then you boil it for a long time so it's more like very thick syrup, but quite tasty, because it is fruitier. This year the fruit I got wasn't free, but I got a good deal because I picked my own. A couple of ladies from church and myself went up to the Gizdich Ranch in Watsonville to pick berries and it was great fun. I ended up with 19 pounds of boysenberries and about 5 pounds of olallieberries. By the way, when you say "olallieberries," it sounds like "lalaberries," even though Wikipedia says you pronounce it "oh-la-leh." Olallieberries are some sort of hybrid, you'll have to look at the little chart. Too complicated. Anyway, they make a good jam and a good pie, but they are a little tart for eating fresh, not quite like blackberries or raspberries, or even boysenberries. Those boysenberries on the bushes were so big and pretty, I just had to keep picking them, and the two women I was with helped, and that's how I ended up with 19 pounds.
When I got home that night I made two batches of jam the regular way, with the pectin and the whole lot of sugar, and then darling Lovemuffin saw how much sugar it was and thought we should try something different. Which was weird. He's never been one to be concerned about his sugar intake. I started looking up recipes for pectin free jam, and in my vast research (read, about half an hour of web surfing) I decided that I would try a small batch using one part fruit, and one part sugar, and a little lemon. And it worked really well! It set up well, it's nice and fruity, not too sweet, and you can do a pretty big batch all at once instead of having to do a lot of small batches over and over again. Which is kind of nice, but it's also nice to have small batches to process in the hot water bath, so that you can fit all of the jars in at the same time.
Here's what I did for my larger batch that worked really well:

Less Sugar Boysenberry Jam
11 cups mashed boysenberries
1 lemon, zest and juice
11 cups sugar

Place mashed berries and lemon zest and juice in a large pot, and bring to a gentle boil. Add sugar slowly, stirring with a very long handled wooden spoon. Bring it back to a full boil and let boil for 10-20 minutes, or longer if you aren't at sea level. The texture of the bubbles will change. If that makes sense. I took some videos, but I'm having a hard time posting them, there are some pictures that might give you the right idea, and I'll try to describe it. The bubbles become more caramelly and persistant. When the sugared fruit starts boiling, it looks pretty much like water at a full boil, and then when it is ready to set up, therer are more bubbles constantly, it is hard to tell when one pops and another takes its place.
Before:


After:


When the jam changes in this way, ladle it into clean jars, wipe the top and put on the lids and rings, and process in boiling water. I did mine for 10 minutes and the lids popped right as I took them out of the water. If you are at a higher altitude, process for longer. This batch set right up and I really like the texture of it without the pectin. The pectin-free jam made from berries seems different than the one from apricots, less like syrup and more like regular jam. Probably the berries have a lot more natural pectin in them than apricots. Another thing I have heard that you can try to make pectin-free jam is to use a quince in it, because quinces are supposed to have a huge amount of natural pectins. Maybe I'll try that sometime too. I have to say a big THANK YOU! to Lovemuffin's cousin, for introducing me to a new method of making jam. It's really fun to know that you can experiment with jam and it will still taste good, even if it doesn't set up exactly the same as it would if you follow exactly the recipe from the pectin boxes.

27 June 2010

Rhubarb Cobbler


Rhubarb has always fascinated me. It looks like pink celery, and it tastes so good in pie. It's amazing. If you have ever had rhurbarb, its was probably in strawberry rhubarb pie. When I was in high school, I really wanted to grow rhubarb in our yard because I had heard that it grows really well in cold places like Siberia and Wyoming. My dad never really got on board with that idea, maybe because he only knew of one thing to do with it. But I have always been sure that there is so much more to do with it, I just need a lot to experiment with.

Now, whenever I see good fresh looking rhubarb at the grocery store or the farmers market, I buy a couple of stalks and either use them immediately, or cut them up and freeze them for future use. It freezes very nicely, just spread out the pieces on a cookie sheet so they aren't all in a big clump and then put them in a freezer bag so that you can measure them easily when you use them later. Elise, of my favorite food blog, simplyrecipes.com recently posted a bunch of great looking rhubarb recipes, I haven't had a chance to try them all, because I keep getting stuck on this rhubarb cobbler recipe which I want to share with you today.

A couple of years ago I saw this recipe for rhubarb cobbler online, I don't remember where or I would post the reference, and it is awesome. We tried making it in the dutch oven with my family with the same dumping method you use to make peach cobbler with canned peaches, but it didn't have enough liquid in it to make the cakey part turn into cake, and it was way too sweet, plus the melty wax from the everlasting candles we put in for Motherdear's birthday, and overall wastn't the best cobbler experience ever, so that was kind of a bummer. So here is the tried and true method that you do in a cake pan in the oven.

Rhubarb Cobbler
3 c. chopped rhubarb
3/4 c. brown sugar
4 Tbsp. butter, melted
2 eggs, lightly beaten
1/2 c. milk
1 1/2 c. flour
2 tsp. baking powder
1 c. sugar

Preheat oven to 350 degrees, butter a 9 x 11 inch pan. Combine rhubarb and brown sugar in a medium size bowl, mix well and set aside. In a large bowl, combine 3 tablespoons of the melted butter, eggs, milk, flour baking powder, vanilla, and sugar. Beat with a heavy whisk until a smooth batter is formed. Pour the batter into the prepared pan. Spread the rhubarb mixture over the batter in an even layer. Drizzle with the remaining melted butter, bake for 40 minutes, maybe a little longer if you want the middle not quite as gooey as it looks in the picture above. Serve warm with vanilla ice cream, if desired.

Variations:
*Add 2 or more teaspoons (to taste) minced fresh ginger root to the rhubarb/sugar mixture, prepare and devour as usual.
*Add orange zest and up to 1/4 c. orange juice to rhubarb/sugar mixture (decrease amount of sugar if you are adding juice), prepare and devour as usual.
*I kind of think that the amount of sugar in the rhubarb part can be reduced a little, as you like it. It is important to have some sugar, because it helps make it liquidy, which seems important for cobbler, and rhubarb is very very tart on its own. But you may want to reduce the sugar if it sounds like too much for you.

18 May 2010

My babies are growing up so fast!


Here are my plants, see how grown up they look! The zucchini is kind of going crazy, it is getting tons of flowers, and I'm kind of nervous about them, though, I'm not sure if I'm doing it right. But the other day we sauteed one and it was tasty, so I guess it's okay. My landlady says you can eat the flowers, so maybe we'll do that too. There are two bell pepper plants now, I planted the second one about a month after the first one, I think I saved the poor thing from the home depot. The small one is just barely starting to get flowers and buds on it, but the big one has a couple of peppers and even though they are going kind of slow, they are definitely growing.  The tomato is humongous, it has flowers on it, but I haven't seen any fruits growing yet. I like to go out and give them hugs and whisper to them about how special they are.


01 May 2010

Bright and Tasty Vegetable Stew


The idea for this dish is from a Moroccan tagine. Something that I have never actually eaten, unfortunately, but I saw this recipe for a lamb tagine with all these different vegetables, and I really wanted to try it. We were feeding the missionaries, and what better time to experiment with crazy food than when you have a captive audience, right? Actually, I get super nervous about cooking for other people, start thinking too much and second guessing myself, so maybe not the best idea after all.

The original recipe is from a cookbook I got at the library, "The Africa Cookbook: Tastes of a Continent" by Jessica B. Harris. It calls for lamb, carrots, turnips, eggplants, calabash squash (like a pumpkin) and zucchini, along with spices, of course. That combination of vegetables seemed a little more autumnal that I wanted, so I did something a little different, and hopefully still preserved the spirit of the thing. I meant to serve it with couscous, but apparently I didn't have any couscous. It was really good with the rice that I cooked instead with vegetable stock and a little cardamom. You could of course add meat, beef or lamb would be good, brown them to start with in olive oil and spices, then add the vegetables as directed. Or you can grill your favorite meat and serve it on the side, in case you are feeding a vegetarian. Pesky vegetarians.

Vegetable Tagine 
olive oil for sautéing
5-6 carrots, chopped into 1 inch chunks
1 onion, chopped not too small
2 teaspoons fresh ginger, roughly chopped 
fresh ground black pepper, to taste
5 or 6 cardamom seeds, or about 1/4 tsp. fresh ground cardamom
pinch saffron (optional)
3 sweet bell peppers, chopped into 1 inch chunks
3 zucchinis, chopped into 1 inch chunks
1 - 1 1/2 cups vegetable stock
6-8 sprigs cilantro, leaves coarsely chopped
6-8 sprigs parsley, leaves coarsely chopped

Sauté the carrots and the onion in olive oil for a couple of minutes, add cardamom, black pepper and saffron, half of the ginger. Add the bell peppers, and zucchinis  and stock. Simmer covered for 20-30 minutes, add the remaining ginger halfway through. Stir occasionally until the vegetables are soft and there is less liquid, it shouldn't be too dry, but it shouldn't be soupy at all. Add the chopped cilantro and parsley leaves, let simmer an additional 5 or so minutes. The colors of the vegetables should be bright and cheerful, and the flavor with the spices will be bright and cheerful, too. Serve along with rice or couscous flavored with cardamom or thyme.
Serves 6.

29 April 2010

My Macaroons

Already I have forgotten where I learned this, but recently I discovered that the word "macaroon" in Italian refers to almond paste. The word macaroni is from the same root, something to do with paste. If you go to a French bakery and they have something called macaroons, they are some kind of sandwich cookie, sometimes they have all sorts of different flavors and colors, but they sure don't have coconut sticking out all over-they are strictly an almond based cookie. Just do a quick image search, you'll see what I mean. 

The European macaroons are delicious, but I am obsessed with coconut, and I like my macaroons with toasty coconut and just a little almond. I like the coconut chopped finely, I think it makes a better textured cookie, and I don't get strings of coconut stuck in my teeth. These are pretty sweet cookies, so I started using unsweetened coconut, which I found from Bob's Red Mill at Whole Foods.

Macaroons
1 1/2 c. unsweetened coconut
1/2 c. almond pieces
1/2 c. sugar
2 egg whites

Preheat oven to 350. Grease a cookie sheet. Chop up the coconut and almond finely - I do this in a spice grinder, but don't turn it into powder - place in a small bowl. Add sugar, mix in. Add egg whites, mix well. Scoop small balls of the mixture onto the cookie sheet, only about 2 tablespoons per cookie. Bake for about 10 minutes, let them set on the pan for a couple of minutes, then scoop them off and let them cool on a rack.
Note that these cookies will not spread out, you can place them very close together on the pan and they will not grow into each other.