Search This Blog

27 December 2011

Deliciousness

On my flight to the Frankfurt airport, I heard the flight attendants talking about this spread that is like peanut butter but tastes like speculatius cookies, which we love. Listening to them, I thought, they don't know what they are talking about, they probably think Nutella is this special spread. But today at the grocery store, while looking at the different hazelnut spreads, I found.... speculatius spread! As well as some other flavors, like coconut and pistachio. We think this will be killer on crepes, we're planning a crepe brunch party next Sunday. I'm also trying to calculate exactly how much of this stuff I can fit in my bag, and I'm glad I packed light. Oh, for your reading pleasure, a very short article about the market for this stuff in Belgium.

speculatius (speculoos, speculaas) spread
Here's another bit of deliciousness from Germany. Quark is a soft, fresh cheese, kind of in between yogurt and cream cheese. I only heard of quark last summer, so I've been looking for it here and so far been unsuccesful in finding plain quark, but I have found several flavors, like these two savory ones, and the plum/cinnamon holiday flavor as well as other fruity flavors.

red pepper and herbed quark spreads

Plum and cinnamon quark

Oh, and here's a little quark brotchen, it's kind of like a cream cheese danish, and I've eaten at least three of them already. We've gotten them from cheap self-serve bakeries for about 1 euro. I'm so impressed that even the cheap places like those bakeries have really good stuff. I wish there were more places like that in the States.

quark filled sweet bread


three of us with our quark breads

 This was quite possibly the best apple strudel I've ever had. Of course, most of the strudel I've had has been super cheap frozen grocery store variety when we were living in Vienna. So, yesterday morning we went out to a Viennese cafe for warm drinks and cakes, and some of use ordered strudel. It was obviously the best choice since there was a fight over the last few crumbs. The cakes and marzipan stollen look pretty good, but they didn't come with warm with warm vanilla sauce and whipped cream and currents. Yeah, I know, you wish you were here, right?

Viennese apfel strudel
chocolate/vanilla cake for the monkey, gluhwein cake with cherries, and stollen with marzipan for Lovemuffin
 

26 December 2011

Weihnachtsmarkt Foods

I'm in Germany for a couple of weeks for Christmas and New Years with Lovemuffin's family. Last week we enjoyed the Weihnachtsmarkt (Christmas market). We visited 3 markets, Wiesbaden (where we are staying), Mainze (where I got most of my pictures) and Rudesheim (which is supposed to be great, but it was a little disappointing for us). We tried to go to the Frankfurt one, too, because we heard it was big and awesome, but we got there a day late and they were just finishing taking down all the stands. That was too bad.

My favorite market was the one in Mainze, because that is where we found these amazing mushrooms. The mushrooms were simmered in this creamy sauce that is a little bit spicy, like it maybe has spicy paprika in it or something, not strong chili powder. Then they top it with a big spoonful or two of sour cream plus cucumber/herbs (I think it's cucumber in there, something crunchy and refreshing). It is so good, I'm very impressed. I'm sure other Christmas markets have these mushrooms too, but Mainze is close and cheap to get to and I went back a second time for more.

mushrooms cooking in cream sauce, one side is done, the other just started

Mushrooms in cream sauce with sour cream topping

Another food that is nice at the markets is curry wurst. It is a sausage with a ketchup-y sauce on top with a sprinkle of curry powder spice. You can also get fries on the side topped with mayonnaise and ketchup. This delightful meaty treat is not restricted to Weihnachtsmarkt, I've had it in the summer at bratwurst places, and I would definitely recommend it. We think that they ketchup sauce is a little different that regular ketchup, but still made by Heinz. We saw a bottle in a store and I think I'll try to bring some home. It's pretty good stuff and I might try it on a veggie sausage.


almost close-up shot of curry wurst

enjoying curry wurst
Here's another bit of delectableness. I think these are called schoko-kuss, but I could be wrong. These come in lots of different flavors, and are filled with marshmallow goodness. Surprise, marshmallows are much better when fresh. The first time we got them, we shared a box of 12, and we were so surprised and pleased with their deliciousness, we decided to go back for a box of 25. But you can get very sugar-high very fast when eating these.

variety of shoko-kuss


"After Eight" minty marshmallow treat

"After Eight" and liebkuchen flavored schoko-kuss

Before coming this year, I had heard that the Weihnachtsmarkt smells great, and one of the things you smell when you walk around them are these candied nuts. They are mostly almonds (mandeln), but you see some pecans, pistacchios, etc. There are usually different flavors of mandeln made with different spices or flavorings like amaretto. They are kind of expensive, these little (100 gram) packets costed 3 euro each, but they smell and taste so good.

packets of spiced mandeln

The other thing that you see at every Weihnachtsmarkt is Glühwein, which is a mulled wine. I haven't partaken (so, no pictures), but it comes in these cute commemorative mugs that say which city you drank it in. If you return the mug, you get part of the money back, so say you pay 2 euros for a drink, you bring the mug back and get 1 euro back. Or you can keep the mug as a souvenir. We made our own spiced fruit juice drinks for our celebrations at home. More on that later.

Oh, and to celebrate my 100th post, here are some extra pictures.

Mainze Weihnachtsmarkt

I don't know what these are called, but I like them

me and brothers-in-law at markt
sausage/salami stand at market with blutwurst/blood sausage (at just left of center)
Mainze Weihnachtmarkt surrounding the Romanesque Cathedral

17 December 2011

Gooey Orange and Cardamom Chocolate-filled Cookies

I've been trying to think of a way to do chocolate and cardamom cookies, and I thought a good way to do it would be to make a ganache with cardamom in it, then wrap that in cookie dough. A quick google search shows this recipe, which proved that it was not an original idea, and that it would probably be successful.

These are marginally more complicated than chocolate chip cookies. First make some ganache (for such a fancy word, it isn't that complicated to make) and let it chill. Now make a complementary cookie dough. Scoop chunks of chilled ganache and roll them in to smallish balls. I know you want them to be enormous, but trust me, it works better this way. Wrap the ganache balls in cookie dough. Keep the ganache chilled, if it starts getting soft, take a break and put it in the freezer for a few minutes.

Now bake your cookies as usual, and try to share. On a thermodynamic note, try to let them cool a little before biting right into them, the cookie part might seem just the right temperature, but the gooey innards will be hotter, like molten lava, and they will burn your fingers and tongue and everything if you are not careful. Yes, I know from experience. When I made this amount of ganache, it lasted for 2 batches off cookie dough, which is how I know I prefer the orange version instead of plain, so you may want to double the batch of cookie dough, but it's hard to say because I was still working out how big the cookies could be and how much filling to put in them.

gooey chocolate filled cookies

Cardamom Chocolate Ganache
(these measurements are approximate because you may want to make it more or less sweet or cardamom-y)

1 cup whipping cream
3 Tbsp unsalted butter
1/4-1/2 tsp. ground cardamom
12 oz dark or semi-sweet chocolate
2-3 Tbsp honey (I used orange blossom honey, but regular clover honey would be great)

Heat the cream and butter together in a saucepan until it just starts boiling. Add the cardamom, then pour over the chocolate. Stir until the chocolate is melted completely, then stir in the honey. Let it set in the fridge for at least an hour. Scoop out teaspoon (or slightly larger) sized balls, and store in the fridge until you are ready to form the cookies, or in the freezer if you don't anticipate using it right away. And don't let your lovemuffin eat them all before you have a chance to stuff it into cookies.

Orange Cookie Dough
(base on Original Nestle Tollhouse chocolate chip cookie recipe on bag)

3/4 cup butter (1 1/2 sticks)
1 1/2 cup white sugar
1 tsp vanilla extract
2 large eggs
zest from 1 small orange (more or less to taste)
2 1/4 c all-purpose flour
1 tsp baking soda
1 tsp salt

Cream together butter and sugar. Add vanilla, eggs and orange zest. Mix together flour, baking soda and salt, then mix well into wet ingredients. Cover and chill in refrigerator a few minutes, or longer until you are ready to form the cookies.

Now, take a ball of chocolate, scoop out some cookie dough, and wrap the cookie dough around the chocolate. there should be 1/2" or so surrounding the ganache. I'm sure there's a good way to figure out the exact correct proportion of cookie to ganach, but I did not do it this time. I just know that they can't be too big. Bake cookies at 350 for  9-11 minutes, until the edges are golden and the middles are set. Let cool for a minute on pan, then scoop them onto a cooling rack.

16 December 2011

Christmas: Making Chocolates Part 2, Caramels

To make caramel centers for dipping or for eating, you will need: a large saucepan, a long-handled spoon or spatula that you can stir with that won't damage your saucepan (so, no metal implements on a Teflon-coated pan), a buttered cake or casserole pan and a candy thermometer. Start by calibrating your thermometer. You'll have to figure it out from those instructions, because I sure can't explain it. Now get ready to stand by the stove and stir for a while.

Basic Caramels:
2 cups heavy cream
1 tbsp. butter
2 cups white or brown sugar or combination
2 cups light Karo syrup
1 tsp. vanilla extract

Start by scalding the cream. When milk/cream is heated, the proteins in it get changed and coagulate somewhat. If you've ever wondered why you sometimes get a skin on hot chocolate, this is why. So if you don't want this skin or scummy stuff to form when you actually make the caramel, scald the milk first. If you put a tablespoon of butter in with the cream, then by the time the butter melts all the way and small bubbles are coming up the sides of the pan, the milk should be scalded. You can skip the butter, but it is nice not only because it's melting time seems to line up with the scalding time, but it also prevents a skin from forming on top. If you skip the butter, you will have to pull off a skin before you use the cream. When you pour the cream out of the pan it will leave behind the coagulated deposits.

coagulated proteins: scum from scalding cream

Pour the scalded cream, sugar and Karo syrup into a large saucepan. Start heating on low heat, stir to dissolve the sugar. When all the ingredients are thoroughly mixed/dissolved, turn heat up to medium, bring the mixture to a boil, stirring constantly. Keep heating mixture, watch the thermometer, you'll shoot for softball stage, which is 240 degrees Fahrenheit. As the caramel develops and more moisture evaporates, the nature of the boiling will change, I was going to try to get some good pictures of it, but it was too hard to stir at the same time. But once you do this the first time, you'll see what I mean and you'll have a better feel for it next time. If you want the caramels to be softer and gooey-er when you bite into them, turn off the heat just before it reaches 240 (or your calibrated temperature), one or maybe two degrees less. You can do the softball test to see if it is at the right level of hardness for your taste. Take off the heat and add vanilla, be careful because it will spatter when it hits the hot caramel. Pour into a buttered pan, a glass cake/casserole pan is nice because then you can see how deep the caramel is so it's easier to cut it to size later.

Let cool for several hours. Depending on the final gooeyness of your caramel, you may want to cool it in the fridge, but if it sets up really hard, it will need to be at room temperature to cut. Cut the pieces, approximately 3/4 inch cubes is a good size.

cutting caramels

When you cut the pieces, put them on a buttered plate or tray of some kind in a single layer and chill in the fridge or freezer. If you stack up extra layers on top they will squish each other, so keep it single layer until they are very cold and firm. I did three layers at first, and I had to re-cut them. This is what they looked like:

Squishy caramels, completely fused together

Keep chilled until you are ready to dip.

Now for the modifications!

Coconut Caramels (tropical and exotic!):
1 1/2 cups heavy cream
1 1/2  cup white sugar
1 cup Karo syrup
approx. 1/2 tsp ground cardamom (optional)
coconut flavoring
2 cups unsweetened shredded coconut

Follow basic directions as outlined above, except: Cook to 235-237 degrees. If using cardamom, add it when you are 1 or 2 degrees away from the end goal. When it gets to the goal temperature, take off heat, add coconut flavoring, and stir for a minute or two, let it cool off some more before adding the shredded coconut. This one will set up harder because of the coconut, so you don't want to cook it to as high of a temperature. I cooked mine too long and they are a little too hard, but the cardamom gives them a heavenly flavor.

mmmm.... coconut cardamom centers ready to eat, er, dip....

Pomegranate Caramels (tangy and fruity!):
1 1/4 cup concentrated pomegranate syrup (find at a Middle Eastern market. Pomegranate molasses is almost the same thing but with some sweetener.)
1 1/2 cup sugar (more or less depending on how sweet your pomegranate product is)
1 cup Karo syrup
1 1/2 cup heavy cream

Follow basic directions as outlined above, except: Cook to 250 degrees, possibly even higher. For some reason the fruit in this one makes it set up really soft at softball temperature, so cook it to a higher temperature and it will still be soft. You can test it, see if it is at soft ball stage. This was an experiment for me, and it was extremely successful, they are Lovemuffin's favorite and so now I'm obligated to make more sometime. These are especially good dipped in dark chocolate.
three kinds of chocolates: coconut, pomegranate, and caramel

Thanks to my dad for recipes and recommendations! And to my Carpooling Friend for letting me use her saucepan!

15 December 2011

Christmas: Making Chocolates Pt. 1

Almost every year my family would make chocolates as treats to give to friends and extended family. I remember this being a really fun time, but now having done it on my own, it must have been a pretty stressful project for my parents. But I'm so glad we did it because I have so many good and some silly memories of being with my family, making something to share with other people. This year I made these to bring to a party where we were supposed to bring our family's traditional Christmas treat. I'm going to put up 2 posts, this first one will talk about the dipping process and some basics, the second will give recipes and details for the caramel centers.

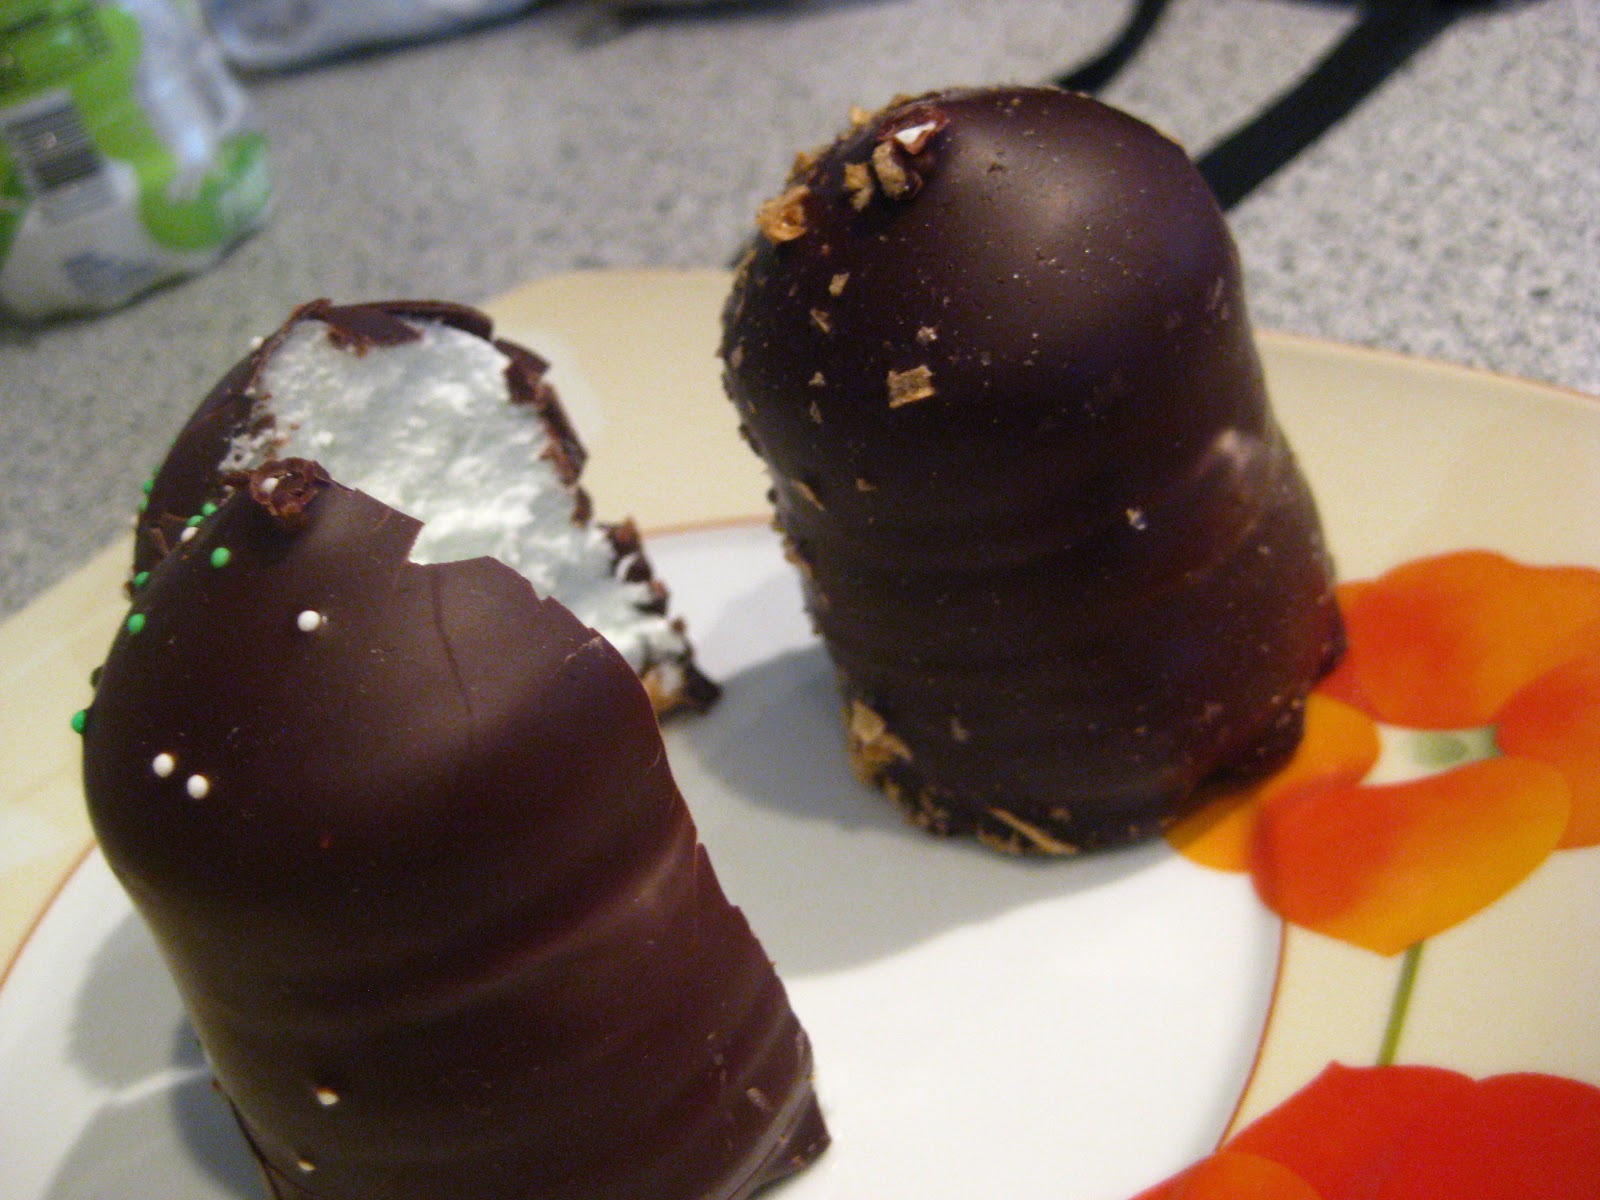
freshly dipped caramels and coconut caramels
Here's what needs to happen: 

First make the caramel or other type of candy centers. You can do this several days ahead of time. Let the caramel cool completely to set up, wash your hands (see note 1), and cut caramel into appropriate sizes and shapes. If you form the different types of centers into different shapes then it is easy to distinguish them later when they are all dipped in chocolate. I tried to do this consistently, but kind of gave up on some of them and now I can't tell if most of them are regular caramel or coconut caramels. Keep the cut centers cool in the fridge or freeze them if they are very soft (some of mine were even kind of gooey when frozen!), until you are ready to start dipping.

melting milk and dark chocolate
square caramels and coin-shaped coconut caramels

When you are all ready and have time to dip all your centers, start getting your chocolate ready (see note 2). For this you will probably want a double boiler (I just used a small metal bowl over a pan of water, but how 'bout this nifty gadget?), and I think the microwave is a good option for melting it too. This can take some time, be patient, don't scorch it, it will be okay. Here's some instructions for tempering chocolate from Mark Bittman, and here's some from Ghiradelli. Tempering the melted chocolate prevents dull, grey, spotted chocolate with a crumbly texture. My new Chocolate book gives less precise instructions than the websites. The author says that you can't use a thermometer to temper correctly, I'm not sure if he is correct, or maybe he just said that because he didn't want to give as good of directions in the cheapo book. Perhaps the exact temperatures depend on what type of chocolate it is and it's fat content. But I did learn from him that you want to use high quality chocolate with a high percentage of fat, because when it melts, it is runnier at a lower temperature, so you don't get too thick of a coat on each piece. To that I say, how thick is too thick? My conclusion: Use the highest quality stuff you can find; if what you can find is chocolate chips, that is fine, go for it. You can see in my picture (at bottom) that my attempt at tempering didn't go so well, but they still taste great. I thought I was tempering it just right, but still got some spottiness and some have pretty crumbly outsides. Since the tempering process can take a while, this is a good time to do some more prep work. Wash your hands and prepare trays for places to put the dipped chocolates by laying out buttered aluminum foil (see note 3) or wax paper onto flat things--trays or baking sheets. Cut up and shape the centers if you haven't done that already.

dip the center...
...plop the dipped center onto the tray

So, now your chocolate is melted, tempered (hopefully) and your centers are cut and formed into the shapes you want and chilled, and your hands are clean, it's time to start dipping! Pour a small puddle of chocolate onto a warm plate (see note 4), then take a chilled center/caramel and drop it into the chocolate, use a clean dinner fork, roll the center around until all the sides are covered and then scoop it out, tap the fork on the plate a few times to get off the excess chocolate, and plop it on to the prepared surface. Don't leave the centers in the chocolate for long--you should just need to turn it over once or twice, then get it out. Dip centers until you don't have enough chocolate on the plate anymore, or until the chocolate is starting to get too cold and stiff to dip. Scrape the cooling chocolate from your plate back into the rest of the melted chocolate, stir, re-warm your plate if you want, and then start again. Melt more chocolate as needed. When you have filled up a tray of chocolates, bring them to a cool place to let them set up all the way. I opened a window in the bedroom and that turned out just about right. In the end I made 3 batches of caramel (recipes coming soon!) and used about 4 pounds of chocolate.

three kinds of chocolates: coconut, pomegranate, and caramel


When your chocolates are cool, you can get fancy little paper cups and boxes to put them in for gifts. Packaging the chocolates doesn't sound that fun, but I liked it because we got to look at them all and find the beautiful ones to put in boxes for our favorite people. We also tried to make ugly ones sometimes, with clumpy exteriors so that we could eat them ourselves.

see the spottiness of my imperfectly tempered chocolate?

Notes:
1) Keep everything very sanitary. Clean double boiler, clean plate, clean fork, and most of all, clean hands. Keep your hands clean when forming the centers, preparing the chocolate, dipping, and packaging the final product. Wash your hands if you touch anything, especially your face or a doorknob or the fridge handle. Because the chocolates are not going to be baked or in any way exposed to high temperatures after this point, you need to reduce the likelyhood of any germs getting in them, especially if you are giving them away.

2) When melting the chocolate, and when pouring the chocolate from the double boiler to your plate, be extra careful to not let any water get in it. Chocolate will seize and get a curdled texture that is completely unworkable if water gets in it. There were a couple of times when pouring the chocolate onto my plate when just a drop of water fell from the bottom of the bowl onto my chocolate puddle and I freaked out and immediately soaked it up with a paper towel, which (surprisingly) worked, but Lovemuffin could hear me in the kitchen yelling at my chocolate, "Are you okay???" It was pretty scary. For both of us :)

3) Buttered aluminum foil is (in my opinion) way easier to use because the edges don't curl up. In fact, you can form them around the corners of the trays you use. But if you already have wax paper on hand and don't mind the way it likes to curl up, or you have a trick for dealing with that, you can certaily use it and it will work fine.

4) You can warm up some plates in the oven on a low temperature (be sure to handle with a clean hot pad when warm!), it helps if you've just cooked dinner or something and the oven is still warm but cooling down. This isn't super necessary, but it made it easier for me because the chocolate doesn't cool down as fast and you can dip more centers at a time.


The hardest part of dipping is not licking your fingers when they look like this.

Thanks to my dad for his recommendations and scientific insights that helped me with the project and this post.

03 December 2011

banana pancakes

Here's something else to do when you have over-ripe bananas and don't want to make banana bread or muffins. Take your favorite basic pancake recipe (this should work with pancake mixes too) and mash up 1 or 2 bananas (I did 3 the first time and it was super banana-y, so if you like that, go for it). Add mashed banana to the liquid. Mix together liquid and dry ingredients and cook pancakes as usual. The pancakes turn out very tender and so delicious. I've had a little problem with the very middle not being cooked all the way, so be careful of that. These are good with fruity toppings-syrups or jams or just cut up fresh fruit, honey and butter, maple syrup, ginger syrup (I bet, I don't have any right now to try, though) or ice cream.

banana pancake with blackberry sauce


Here's the exact recipe I made, in case you don't want to experiment with your own. (Adapted from Better Homes and Gardens "Buttermilk Pancakes")

Banana Pancakes

1/2 cup all-purpose flour
1/2 cup whole wheat flour
1 tsp. baking powder
1/4 tsp. baking soda
1/4 tsp. salt
1 tsp. cinnamon and/or other favorite spices
1 beaten egg
1 cup milk
2 Tbsp. cooking oil (optional)
1 or 2 over ripe bananas
1 tsp. lemon juice
1 Tbsp. sugar

Mix together dry ingredients (flour, baking powder, baking soda, salt and spices) in a medium sized bowl. Set aside.

Mix together egg, milk and oil. Mash bananas, sprinkle with lemon juice and sugar, stir it around, add it to the egg/milk/oil mixture. I do this all in my pyrex liquid measuring cup so I don't have to wash another bowl, and it all fits.

Start heating up your griddle, when it's just about warm enough, add the wet ingredients to the dry and stir gently, getting to the bottom, but don't over mix. The batter might be lumpier than usual because the bananas don't always get mashed completely smoothly. Cook the pancakes like normal, eat with your favorite toppings.

banana pancake with vanilla ice cream and blackberry sauce

02 December 2011

Thanksgiving: Roasted Vegetables

Roasting is a good idea for autumn vegetables whether it's Thanksgiving day or not. It would be nice to have for a big Thanksgiving crowd because you can make massive quantities of it by buying normal quantities of several kinds of vegetables. This bowl of chopped vegetables lasted three people for at least four meals. Oh, and it is delicious. And its so great to have more vegetables at Thanksgiving feasts, they are so typically carb-heavy and turkey-emphatic. I don't have anything agains carbs or turkey, but I do love extra variety, and you (probably) know by now how I feel about vegetables.

vegetables, pre-roasting, so pretty!
Preheat oven to 425. Cut up you favorite autumnal vegetables into similar sized pieces. Some good vegetables to start with (and I'm sure you'll have more ideas): Brussels sprouts, carrots, summer or winter squash, onions, mushrooms and celery, and now that I think of it, cauliflower would be a good addition, too. Toss the generously with olive oil, add mashed roasted garlic (optional) and any spices you want. I just used black pepper.

Place in a single layer in a pan, sprinkle with coarse kosher salt, cover with aluminum foil and put in the oven. After 30 minutes or so, the vegetables should be making a lot of bubbly noises in the pan, and will be starting to look a little more cooked, shrinking and losing form somewhat. If that is what's going on, take off the foil and let them roast about 10-15 minutes more, turning occasionally with a spatula, you should start seeing darker edges on some vegetables, they should all be tender and shiny, and the mushrooms should be shriveling up.

I made these again tonight to eat with gnocchi. I tried steaming the less tender vegetables (carrots, Brussels sprouts and celery) to see if it would speed up the roasting time so that it could be more of a make-ahead dish, but steaming didn't cut down appreciably on the time needed for roasting.

roasted vegetables

Thanksgiving: Pies

We made lots of pies for Thanksgiving, which was fun because there weren't very many of us, just Older Brother, Lovemuffin, and me, and we shared with everyone we could, but we still had lots leftover to eat for breakfast and lunch and dinner the whole weekend. I hope you have noticed the new link I put in my sidebar, my visiting teacher has a blog devoted to desserts and it is lovely. I used two recipes from her blog, which was wonderful because she had them up before Thanksgiving, unlike me. But on a positive note, my crusts were excellent (not bragging, just a fact). I doubled my recipe, used a lower proportion of whole wheat flour, and ended up with enough for 5 single-crust pies with a little left over.

One pie was a pecan and chocolate delight that we brought to someone else's house so that we wouldn't eat the whole thing. I had about 3 bites altogether and kind of regretted sharing so much.

Pecan Chocolate Pie


The second was cranberry cream pie. I made three of these in three days so that we could share and still have plenty of our own. I had a hard time getting this one to set up as much as it is in her picture. It was pretty soupy until it was completely chilled. And you know we were eating it before it was completely chilled. This soupiness I attribute to the fact that the cranberries were frozen before I made it, so when I rinsed them off probably some water stayed frozen on them and messed up the balance of liquid to thickener. I think I will keep experimenting with this one, maybe try instant tapioca as a thickener as well as not frozen berries. And I think it would be lovely with some other fruits too, so you might see this come up again.

Cranberry and Cream Pie


The other pie I made was pumpkin and coconut, which I thought would be great after my pumpkin/coconut cake experiment. And it was mediocre. I more or less followed the recipe on the back of the Libby's canned pumpkin, but replaced the evaporated milk with coconut milk, added extra spices including cardamom, and added about 3/4 cup of shredded coconut chopped more finely in my spice grinder. The recipe looks very much like this one, but without the Trader Joe's spice blend. Maybe Trader Joe's spice blend would have improved it. Well, it was better on the second and third day, and the coconut milk is a good way to make it lactose-free in case you have one of those that you need to accommodate (hi Dad!). But the coconut flavor was not pronounced enough, and I thought the shredded coconut would be an improvement on the texture of pumpkin pie, but it wasn't. Pumpkin pie isn't my favorite in the best of times, but it was pretty disappointing to have it so unimproved.

Pumpkin Coconut Pie
Older Brother said that someone he knows was telling him about their family, who on Thanksgiving morning all get together and eat pie for breakfast and then of course the regular meal later. I think that sounds  like a great idea and I will probably implement it next year. Or maybe tomorrow. What is your favorite kind of pie for Thanksgiving? Do you have any special pie traditions?

06 November 2011

Toasting Coconut: oven or stove-top?

If you've ever wondered if it is easier/better to toast coconut flakes in the oven or on the stove-top, never fear, I just tested it for you. Or maybe you don't care, but I just have to share my fount of knowledge.

When done in a skillet on the stove, the coconut toasts unevenly and it is easier to burn parts of it, you have to pay close attention and stir it a lot to make sure that it is toasting as evenly as possible. When toasting in the oven, coconut toasts more evenly, it takes longer to burn, but it is easier to forget about, and you have to preheat the oven. I dislike preheating the oven for prep-work if I'm not using it later for the final project, so when Older Sister used the oven method of toasting coconut for the Great French Toast breakfast, I was surprised that she did it in the oven instead of on the stove.

Toasted Coconut: OVEN vs. SKILLET 


In the picture you can see they have different aesthetic qualities, so if you think the variegated colors of the skillet toasting will suit your needs, then do it and pay close attention and keep the burner on very low heat. If you like the more controlled, even color of the oven-toasted coconut, then do it and set a timer to help you remember that something is in the oven and be sure to stir it every couple of minutes.

19 October 2011

What happens when you . . .

Freeze an egg?
I have a friend who told me that she freezes egg yolks or whites if she has a recipe calling for one part of the egg and not the other, and later uses the frozen part for a different recipe that needs the other egg part. I've wondered for ages what would happen if an egg is frozen whole, and this weekend, I found out.


The shell cracked quite neatly, which is exactly what I was hoping for. Here's what it looked like an hour later:

Then I was able to pull the shell right off, leaving this:


After which I put it in the fridge to finish thawing. I ate it for breakfast, and it was edible, but didn't taste or act very fresh anymore. It spread out a lot instead of being thick and firm and didn't have much flavor. I forgot to take a picture of the cooked egg, being hungry at the time.

After the experiment, I thought to read up on the subject in On Food and Cooking: the Science and Lore of the Kitchen (2004). McGee on page 83 says: "Eggs can be stored frozen for several months in airtight containers. Remove them from the shell, which would shatter, as its contents expand during freezing." He also notes that the whites freeze better than the yolks or blended whole eggs, which become pasty  from protein aggregation and do not combine well with other ingredients without proper pretreatment by blending with salt, sugar or acid.  I did not notice pastiness in my egg, and I was still able to keep the yolk soft during cooking. Perhaps my egg was not frozen long enough to experience protein aggregation. What happened to my frozen egg sounds more like the deterioration that normally happens to eggs as they age, which McGee describes on page 81; the white was runny and the yolk membrane was delicate and very easily broken.

Here is one more thought from McGee: "Each [chicken] egg is about 3% of the hen's weight, so in a year of laying, she converts about eight times her body weight into eggs. A quarter of her daily energy expenditure goes toward egg-making; a duck puts in half"(page 73). It makes me think about the chicken named Speck that we had for a little while when I was about 12 years old. One she one day started disappearing for all but 20 minutes a day to come and eat. When we finally found where she was hiding, she had a nest and about 20 eggs that she was determined to hatch. We threw them out, since they would just rot, and she persisted in hiding and laying for several months. Isn't biology amazing?


17 October 2011

Apple Harvest Phase 2

I've been able to use up almost all of the apples by making applesauce (that isn't very good because some of it got burnt), dried apple slices (which we'll need more of) and a couple batches of apple muffins, recipe from the King Arthur Flour website. For the second batch of muffins, I used half apples and half carrots and made them miniature and added extra spices. I think they're pretty cute as well as delicious.

dried apples, applesauce, and the remains of the harvest

Laying out slices for drying

miniature carrot-apple muffins


I used my apple corer-peeler-slicer, which I picked up second-hand for $3 after no one got me one for Christmas several years ago, and which I think I will now call "The Spiraler" because it makes them into neat spirals. It looks like this one, but mine is silver in color, instead of red. 
The Spiraler

I saved all the peels and cores and froze them in the event that I need to make jelly. I also used "Fruit Fresh" to prevent discoloration, and it works better than lemon juice, but the price is a little steep.

no brown apple slices here!
If there is a Phase 3 to this project, it will probably be more dried apple slices, we eat a lot of dried fruit in this house.