I don't love Halloween. I never liked dressing up, I don't like being scared, and all the gross/creepy things on purpose are not my cup of tea. But at work we had a Halloween party, and one part of the festivities was an "ugly food" contest with a promised prize, so I decided to get a little halloween-y and make something a little gruesome looking: eyeballs floating in a pool of blood.
And guess what?!
I won!
Sorry this is too late for y'all to make your own prize-winning eyeballs for Halloween this year, but here it is for next year.
Notes:
If I did it again I would cut the recipe in half. I only made 12 eyeballs and then had tons of the panna cotta left over, which I poured into a bread pan for a mold, sliced and served with more "blood" sauce. It was delicious, but not everyone likes gelatin based desserts, so it was an excessive amount for our relatively small party.
You will need something spherical or semi-spherical-ish for a mold. I used mochi ice cream containers which were (luckily) just the right size and shape to work with the grape "iris", and it was a good excuse to get mochi ice cream from a certain specialty food store. You can also find them at some Asian markets.
I arranged the instructions into very small, very manageable steps; it looks like a lot, but it isn't hard.
Coconut Panna Cotta "Eyeballs" with Raspberry-Cherry "Blood" sauce
2 cans (400mL) coconut milk
2 packets Knox unflavored gelatin (1/2 oz or 14 grams)
1 cup water
1 cup white sugar
12 dried blueberries (more or less, depending on how many eyeballs you want)
6-12 green seedless grapes (more or less, depending on how many eyeballs you want)
fresh or frozen raspberries and/or cherries
a little more white sugar (just a teaspoon or two should do it)
Pomegranate arils (optional)
To make the "eyeballs":
1) Warm coconut milk in a saucepan, stir occasionally, or it will do some crazy splattering. Don't let it come to a boil.
2) Meanwhile, sprinkle gelatin over cold water in a small saucepan, let stand about 1 minute, then start warming this up over medium heat, stirring occasionally, until the gelatin is dissolved.
3) By now your coconut milk should be hot, but not boiling. Pour the hot gelatin water into the hot coconut milk, add the 1 cup of sugar and keep stirring over medium heat until the sugar is dissolved, it should just take a couple of minutes. Remove from heat and let it start cooling.
While the mixture is cooling, start prepping your eyeball molds and with the other eyeball parts:
4) Make sure your mochi ice cream cups (or whatever you are using for a mold - see note above) are clean and dry.
5) Put the dried blueberries in a small bowl, pour boiling water over, let stand for a couple of minutes to soften.
6) Cut some grapes in half latitudinally, scoop out a small amount of grape insides, just enough to fit a dried blueberry inside.
7) Insert the soaked dried blueberry into the hollow you just made in the grape half, place the grape half cut-side down in the mold. Press down to make the blueberry and grape as flat against the bottom of the mold as possible.
8) Repeat with as many grapes and blueberries you need to fill all the molds you have to make as many eyeballs as you want.
9) Pour the coconut milk-gelatin mixture into the molds over the grapes. Hold the grape halves down with a finger while you pour so they stay centered and flat against the bottom and don't get pushed around.
10) Let the panna cotta finish cooling and setting up in the fridge, it will take a couple of hours.
To make the "blood":
11) Warm up some raspberries with a little sugar (I used about 1 1/2 cups frozen) with a little sugar until the sugar is dissolved, the raspberries will break apart, but that is just fine.
12) If you want to use cherries also, place them in a blender (I used about 1 cup frozen) pour the warm raspberry mush in the blender over the cherries, blend together until everything is pureed, but not liquified. Add a little water if necessary to keep the blender from getting stuck.
13) Put the raspberry-cherry puree through a sieve to separate the good stuff from the seeds. Store the sauce in the fridge until you are ready to serve with eyeballs.
To assemble the "eyeballs floating in a pool of blood":
14) Unmold the panna cotta cups onto a serving platter. I had to gently pull some of them out with my fingers, they didn't all come right out easily when I flipped over the mold. Arrange them strategically on the platter.
15) Some of the coconut gelatin may have gone underneath the grapes/blueberries so that when you flip them over it is hard to see the "iris" and "pupil," kind of like a cataract (well, more like a pterygium), so you may perform surgery -- very carefully cut some gelatin away from the grapes so that they'll be visible. This can all be done ahead of time.
16) Just before serving, pour the sauce around the eyeballs artistically, and sprinkle the pomegranate arils around also, if desired.
Claim your prize and dig in!
Credit where credit is due:
Recipe from here, but there are tons of coconut jelly/panna cotta recipes out there that looked amazing. I used this one because it was very basic and simple, just a few ingredients. And it really was delicious.
Coconut and fruit eyeball plus raspberry "blood" idea from here, but it seems like it wouldn't work with kiwi fruit since kiwis have that protein-disolving enzyme, antinidain.
Mochi ice cream mold idea from here.
Using grapes as irides idea from Lovemuffin who answered "grapes" when I asked "what can I use as a spherical jello mold?" (he's so cute.)
Showing posts with label fruit. Show all posts
05 November 2014
Winning Eyeballs
Labels:
cherries,
coconut,
dairy free,
dessert,
fruit,
gelatin,
gluten free,
grapes,
halloween,
holiday,
lactose-free,
not vegetarian,
raspberries
13 March 2014
Getting Ready for Pi Day with Crustless Apple Pies
Tomorrow is Pi Day (3.14... --> 3/14) and it's such a great excuse to make and eat pie, since pi is about circles, and pie is in the shape of a circle, it's only appropriate. (Although I guess there are other treats shaped like circles, but it's not the same. And apparently January 23rd is always National Pie Day, but we always forget about that one.) So, I'm really excited, we should have a lot of pies tomorrow at the office. (I LOVE my work.)
I'm planning to make apple and rhubarb tarte tatin (which I've wanted to try for a long time) based on this recipe, and I kind of want to try a buttermilk pie, because I have buttermilk in the fridge, and maybe I would add orange zest to it. That sounds good, right? I have my pie crusts made, and I did them differently this time, using this recipe, except I used buttermilk instead of sour cream, because of all the buttermilk in the fridge, so we'll see how that turns out. (Don't worry, I did some research, and there is such a thing as buttermilk pie crust, so it should be fine.)
And tonight, to get ready and share the joy of pi(e), I made these Crustless Apple Pies (because these are circles, too). I changed it up a little, we were feeding a gluten-free person, so no flour and no oats because oats are often processed in the same facilities as flour, and are often contaminated with gluten.
Mini Crustless Apple Pies (I'm calling them mini because the apples were pretty small)
6 granny smith apples, cut in half and cored (or any good type of baking apple)
handful of dried pitted dates
honey (sorry, I didn't measure it, maybe 1/8 cup, possibly even less, honey is super sweet)
1 tsp tapioca flour (you could use cornstarch or flour, but if you can get tapioca flour I recommend it, I use tapioca for thickening all my fruit pies now)
1 tsp cinnamon
pinch of freshly grated nutmeg
pinch of cardamom
zest of 1 lemon
juice of 1 lemon
about 1/2 - 3/4 cup sweetened shredded coconut
2 Tbsp butter, melted
Scoop out the innards of the apple halves with a melon baller - I never would have thought a melon baller would work so well on apples, but it's perfect, it's also just the right size for coring the apple halves - leaving about 1/3" of flesh inside of the peel, set aside the scooped out innards, treat the apple shells and pieces with lemon juice to keep them from browning while you work (I didn't have enough lemon juice so I filled up a bowl with cold water and a little white vinegar and let the cut up apples hang out in it).
Soak the dates in boiling hot water for a few minutes to let them get soft, cut into smallish pieces.
Mix together apple-innard pieces (you might want to cut these a little smaller than melon-baller size) and soaked dates, pour on some honey until it looks good (taste a piece of apple to see if its at a good sweetness level), add the tapioca flour, spices, lemon zest and lemon juice, stir it all together.
Place the hollowed out apple halves on a baking sheet, stuff this delightful mixture into each shell, dividing equally between all of them, it should be a little mounded up, but not overfull in each.
Mix together the sweetened coconut and melted butter (I whizzed the coconut through my spice blender for a few seconds to get it into finer pieces, I don't love the texture of it in long shreds), and divide out spoonfuls on top of each apple half.
Bake at 375 for about 40 minutes, the juices will be going all over, and the coconut topping will be crisp, and the apples shells will be getting soft , but not collapsing. Let cool a little and serve, maybe with ice cream or whipped cream.
I'm planning to make apple and rhubarb tarte tatin (which I've wanted to try for a long time) based on this recipe, and I kind of want to try a buttermilk pie, because I have buttermilk in the fridge, and maybe I would add orange zest to it. That sounds good, right? I have my pie crusts made, and I did them differently this time, using this recipe, except I used buttermilk instead of sour cream, because of all the buttermilk in the fridge, so we'll see how that turns out. (Don't worry, I did some research, and there is such a thing as buttermilk pie crust, so it should be fine.)
And tonight, to get ready and share the joy of pi(e), I made these Crustless Apple Pies (because these are circles, too). I changed it up a little, we were feeding a gluten-free person, so no flour and no oats because oats are often processed in the same facilities as flour, and are often contaminated with gluten.
Mini Crustless Apple Pies (I'm calling them mini because the apples were pretty small)
6 granny smith apples, cut in half and cored (or any good type of baking apple)
handful of dried pitted dates
honey (sorry, I didn't measure it, maybe 1/8 cup, possibly even less, honey is super sweet)
1 tsp tapioca flour (you could use cornstarch or flour, but if you can get tapioca flour I recommend it, I use tapioca for thickening all my fruit pies now)
1 tsp cinnamon
pinch of freshly grated nutmeg
pinch of cardamom
zest of 1 lemon
juice of 1 lemon
about 1/2 - 3/4 cup sweetened shredded coconut
2 Tbsp butter, melted
Scoop out the innards of the apple halves with a melon baller - I never would have thought a melon baller would work so well on apples, but it's perfect, it's also just the right size for coring the apple halves - leaving about 1/3" of flesh inside of the peel, set aside the scooped out innards, treat the apple shells and pieces with lemon juice to keep them from browning while you work (I didn't have enough lemon juice so I filled up a bowl with cold water and a little white vinegar and let the cut up apples hang out in it).
Soak the dates in boiling hot water for a few minutes to let them get soft, cut into smallish pieces.
Mix together apple-innard pieces (you might want to cut these a little smaller than melon-baller size) and soaked dates, pour on some honey until it looks good (taste a piece of apple to see if its at a good sweetness level), add the tapioca flour, spices, lemon zest and lemon juice, stir it all together.
Place the hollowed out apple halves on a baking sheet, stuff this delightful mixture into each shell, dividing equally between all of them, it should be a little mounded up, but not overfull in each.
Mix together the sweetened coconut and melted butter (I whizzed the coconut through my spice blender for a few seconds to get it into finer pieces, I don't love the texture of it in long shreds), and divide out spoonfuls on top of each apple half.
Bake at 375 for about 40 minutes, the juices will be going all over, and the coconut topping will be crisp, and the apples shells will be getting soft , but not collapsing. Let cool a little and serve, maybe with ice cream or whipped cream.
11 January 2012
(non-alcoholic) Glöggfest
While in Germany, we had several feasting opportunities and accompanied our food with spiced juices, or non-alcoholic glögg,
or just glögg for short. Apparently my in-laws have had a glögg
tradition for years now and didn't realize it. Every year on the evening when
they decorated their Christmas tree, they would have hot spiced apple cider and
snacks, the perfect glöggfest.
Making
non-alcoholic glögg is super easy. Get your favorite fruit juice, add
some whole spices, and heat it to just below boiling for an hour or so to let
the spice flavors blend with the juice. It also smells good during this time,
so don't rush, enjoy the process.
Good juices to use:
apple cider
blackcurrant juice
blueberry juice
cranberry juice
pomegranate juice
grape juice
orange/citrus
juices
blends of any of
those
anything else you can
imagine (for example, I saw some rhubarb juice in a German grocery store, that
could make an awesome spiced drink too)
Good spices to use:
cinnamon stick
black peppercorn (trust me
on this one - so good!)
cardamom
fresh ginger
orange peel
whole allspice
star anise
whole cloves
Sweeten with sugar or
honey, if desired.
I didn't get any pictures of spiced juice, but I
can tell you that it looks a lot like normal juice. So I'll send you to the virtual
goody plate where she has pictures and specific recipes for more
spiced juices. Like cranberry (good hot or cold) and grapefruit (why didn't I think of this?).
03 December 2011
banana pancakes
Here's something else to do when you have over-ripe bananas and don't want to make banana bread or muffins. Take your favorite basic pancake recipe (this should work with pancake mixes too) and mash up 1 or 2 bananas (I did 3 the first time and it was super banana-y, so if you like that, go for it). Add mashed banana to the liquid. Mix together liquid and dry ingredients and cook pancakes as usual. The pancakes turn out very tender and so delicious. I've had a little problem with the very middle not being cooked all the way, so be careful of that. These are good with fruity toppings-syrups or jams or just cut up fresh fruit, honey and butter, maple syrup, ginger syrup (I bet, I don't have any right now to try, though) or ice cream.
Here's the exact recipe I made, in case you don't want to experiment with your own. (Adapted from Better Homes and Gardens "Buttermilk Pancakes")
Banana Pancakes
1/2 cup all-purpose flour
1/2 cup whole wheat flour
1 tsp. baking powder
1/4 tsp. baking soda
1/4 tsp. salt
1 tsp. cinnamon and/or other favorite spices
1 beaten egg
1 cup milk
2 Tbsp. cooking oil (optional)
1 or 2 over ripe bananas
1 tsp. lemon juice
1 Tbsp. sugar
Mix together dry ingredients (flour, baking powder, baking soda, salt and spices) in a medium sized bowl. Set aside.
Mix together egg, milk and oil. Mash bananas, sprinkle with lemon juice and sugar, stir it around, add it to the egg/milk/oil mixture. I do this all in my pyrex liquid measuring cup so I don't have to wash another bowl, and it all fits.
Start heating up your griddle, when it's just about warm enough, add the wet ingredients to the dry and stir gently, getting to the bottom, but don't over mix. The batter might be lumpier than usual because the bananas don't always get mashed completely smoothly. Cook the pancakes like normal, eat with your favorite toppings.
| banana pancake with blackberry sauce |
Here's the exact recipe I made, in case you don't want to experiment with your own. (Adapted from Better Homes and Gardens "Buttermilk Pancakes")
Banana Pancakes
1/2 cup all-purpose flour
1/2 cup whole wheat flour
1 tsp. baking powder
1/4 tsp. baking soda
1/4 tsp. salt
1 tsp. cinnamon and/or other favorite spices
1 beaten egg
1 cup milk
2 Tbsp. cooking oil (optional)
1 or 2 over ripe bananas
1 tsp. lemon juice
1 Tbsp. sugar
Mix together dry ingredients (flour, baking powder, baking soda, salt and spices) in a medium sized bowl. Set aside.
Mix together egg, milk and oil. Mash bananas, sprinkle with lemon juice and sugar, stir it around, add it to the egg/milk/oil mixture. I do this all in my pyrex liquid measuring cup so I don't have to wash another bowl, and it all fits.
Start heating up your griddle, when it's just about warm enough, add the wet ingredients to the dry and stir gently, getting to the bottom, but don't over mix. The batter might be lumpier than usual because the bananas don't always get mashed completely smoothly. Cook the pancakes like normal, eat with your favorite toppings.
| banana pancake with vanilla ice cream and blackberry sauce |
17 October 2011
Apple Harvest Phase 2
I've been able to use up almost all of the apples by making applesauce (that isn't very good because some of it got burnt), dried apple slices (which we'll need more of) and a couple batches of apple muffins, recipe from the King Arthur Flour website. For the second batch of muffins, I used half apples and half carrots and made them miniature and added extra spices. I think they're pretty cute as well as delicious.
| dried apples, applesauce, and the remains of the harvest |
![]() |
| Laying out slices for drying |
| miniature carrot-apple muffins |
I used my apple corer-peeler-slicer, which I picked up second-hand for $3 after no one got me one for Christmas several years ago, and which I think I will now call "The Spiraler" because it makes them into neat spirals. It looks like this one, but mine is silver in color, instead of red.
![]() |
| The Spiraler |
I saved all the peels and cores and froze them in the event that I need to make jelly. I also used "Fruit Fresh" to prevent discoloration, and it works better than lemon juice, but the price is a little steep.
If there is a Phase 3 to this project, it will probably be more dried apple slices, we eat a lot of dried fruit in this house.
![]() |
| no brown apple slices here! |
04 October 2011
Harvest Time: or I wish I had an orchard
Today I was lucky enough to be able to go to a pick-your-own farm with some friends to pick my own apples. I'm so grateful for friends who let me tag along with them and have a great time with them and their kids.
Since I apparently can't resist fresh produce, and since this year I haven't had a chance to do any jamming yet, I ended up bringing home 60 pounds. I think they are mostly fuji apples, but there might be some cameos too. And they are delicious! This is how apples are meant to be eaten, fresh from the tree. I'm excited to do something with them, hopefully over the next couple of days there will be dried apples and canned applesauce stored away and maybe even some ready-to-bake pies in the freezer instead of all this . . . . .
30 August 2011
Peach Hotcakes
Have you ever noticed how hard it is to find good peaches at the grocery store? We've gotten lucky and our not-as-close neighborhood grocery store has had really good peaches lately. We went there to get some emergency ice cream rations to prepare for the coming hurricane and the peaches reached out and grabbed us and we bought a couple pounds. That hurricane was a bit of a let down for us (the earthquake was scarier), but the peaches were quite good.
I made some peach pancakes based on the buttermilk-blueberry pancake recipe in my Better Homes and Gardens cookbook. I used cardamom instead of cinnamon, and it was okay, but it didn't have a spectacular flavor. I would just go with cinnamon for this one next time. But if you want a recipe for pancakes with cardamom, here's one from Mark Bittman. I haven't tried it yet, but it sounds delightful.
Oh, and for some reason in my family we call them hotcakes instead of pancakes, I've always figured it's because they're bigger than the usual pancakes. If you're reading this and you know the answer, please comment and let me know!
| cooked peach pancake |
| We like them big, but this one was almost unflippable |
Peach Hotcakes
1 c. all-purpose flour
2 Tbsp. semolina flour or cornmeal
1 tsp. baking powder
1/2 tsp. baking soda
1/2 tsp. ground cinnamon (or your favorite complementary spice)
1 Tbsp. honey (or sugar)
1 egg, beaten
1 c. buttermilk or yogurt or whey from draining yogurt or a combination
2 Tbsp. cooking oil
1 peach, cut into blueberry-size pieces, peeled if desired, covered in lemon juice to keep from browning
Mix together flour, semolina/cornmeal, baking powder, baking soda, and cinnamon (and sugar, if using) in a bowl, set aside.
Mix together the honey (if using), egg, buttermilk/yogurt/whey and oil.
Start heating up a griddle for cooking, then mix together the wet and dry ingredients until they are just barely mixed and still lumpy, then add peach pieces gently.
Cook pancakes on lightly oiled griddle, eat with your favorite topping.
22 August 2011
Blueberry Mascarpone Turnovers
I really need a good pastry fix, and these turnovers will do in a pinch. These have a cheese filling (mascarpone cheese, lemon zest and juice, sugar and cornstarch) topped with blueberries. Made with puff pastry from the frozen aisle.
Fold puff pastry over fillings and sprinkle with sugar or cinnamon sugar. Bake at 375 for about 20 minutes (the puff pastry should have instructions for how long to bake it) and the fillings might explode everywhere. I'm not sure how to fix the exploding, but the cornstarch helps a little bit.
17 August 2011
Rambutan
Yesterday we went to Eden Center, an area of town with a high concentration of Vietnamese stores, and got some food and some fruits called rambutan. These are related to lychees, with the outside peel and the inside fruit. These have a very pleasant grape-y flavor, without the floral tones of lychees. The texture of the outside shell reminded me of millipedes, which made me nervous to pick them up, but they weren't gross at all. Older Brother also discovered that if you get the outside shell off mostly whole, you can put it on your nose and look like a clown and have the delicious smell of the fruit constantly wafting up your nose. I'm sorry I didn't get a picture of that.
I also had bahn mi for the first time, mine had caramelized tofu skins instead of meat on it, and it was pretty delicious. I'll definitely be going back for more awesome stuff.
| rambutan before peeling |
| rambutan with fruit in the middle |
13 August 2011
New Acquisitions and Adventures
Older Brother and I went to New York City and Philadelphia the last couple of days and did a lot of walking and sightseeing and visiting of friends. It was exhausting, but I had a great time, and I'm glad that Older Brother wanted to go, because I probably wouldn't have gone by myself. Here are our food adventures, in chronological order.
Before taking off early Wednesday morning, we bought some maps at Barnes and Noble, and I found this book in the bargain bin. I'm excited to try some recipes, and I love the pictures even if the recipes don't turn out.
In New York (between visiting some friends, browsing through fabric in the garment district, and taking the Staten Island Ferry to see the Statue of Liberty) we had some pizza which had a nice crust and lots of vegetables, but it wasn't a revelation, I had high hopes for New York pizza, and maybe it was just the stuff that we got, but it was still just pizza. We also had dumplings from a place in Chinatown, which were good, nice crunchy vegetables inside and not super salty. Older Brother bought these preserved salted kumquats that are really good. Oh, we also had breakfast at Community Food and Juice with a friend, and it was a really nice place, good food and nice atmosphere, I definitely recommend it.
In Philly we saw some more friends and ate lunch with one of them at a place called the National Mechanics in the old city which was pretty awesome. They surprised me with a good selection of vegetarian foods, and I think they deserve their own review (next post). Ws also visited Reading Terminal Market which was pretty awesome, but I didn't buy anything and didn't get any pictures, but it was a very impressive area and I would like to go back.We didn't do a lot of eating in Philidelphia, which is a shame because my friend knows all the good places, but we weren't super hungry after the awesome lunch.
This morning, back home in DC, we went to the Eastern Market, on the hunt for some good produce. We found a good selection of cute eggplants for really cheap, in such interesting colors, I had no idea there was such a thing as an orange eggplant. Aren't they cute? And there were some delicious white peaches, I bought a bunch for some cardamom experiments, hopefully they will be fruitful (haha!) and I'll have plenty to write about here. There were some awesome looking ravioli with different colors, and can you see the sign for chocolate and cream ravioli! We also tried some pastries from a vendor there, and they still didn't stack up to Pavel's, so the hunt continues for the awesomest bakery in the D.C. Metro Area.
Before taking off early Wednesday morning, we bought some maps at Barnes and Noble, and I found this book in the bargain bin. I'm excited to try some recipes, and I love the pictures even if the recipes don't turn out.
In New York (between visiting some friends, browsing through fabric in the garment district, and taking the Staten Island Ferry to see the Statue of Liberty) we had some pizza which had a nice crust and lots of vegetables, but it wasn't a revelation, I had high hopes for New York pizza, and maybe it was just the stuff that we got, but it was still just pizza. We also had dumplings from a place in Chinatown, which were good, nice crunchy vegetables inside and not super salty. Older Brother bought these preserved salted kumquats that are really good. Oh, we also had breakfast at Community Food and Juice with a friend, and it was a really nice place, good food and nice atmosphere, I definitely recommend it.
| stuffing my face with New York pizza |
| Preserved and salted kumquats |
| Food from National Mechanics |
This morning, back home in DC, we went to the Eastern Market, on the hunt for some good produce. We found a good selection of cute eggplants for really cheap, in such interesting colors, I had no idea there was such a thing as an orange eggplant. Aren't they cute? And there were some delicious white peaches, I bought a bunch for some cardamom experiments, hopefully they will be fruitful (haha!) and I'll have plenty to write about here. There were some awesome looking ravioli with different colors, and can you see the sign for chocolate and cream ravioli! We also tried some pastries from a vendor there, and they still didn't stack up to Pavel's, so the hunt continues for the awesomest bakery in the D.C. Metro Area.
Labels:
cookbooks,
fruit,
randomthoughts,
restaurants,
sandwich,
vegetables
01 August 2011
A Green Smoothie
A few days ago my tummy was upset, but I was hungry, so I thought something super healthy with yogurt might help. I gave in to the green smoothie fad and made one with kale, peaches and yogurt for breakfast. I've heard that the flavor of the greens is not noticeable in a green smoothie, but I want to tell you that depends entirely on how much you use. My first batch of smoothie was great, and so for my second breakfast I put even more kale in it, and this time it was overly "green" flavored. So I recommend not overdoing it on the greens. The peaches were nice, they gave it a nice flavor and sweetness and the colors did not clash to make something completely disgusting looking. I didn't measure the ingredients, but I took a picture of the second batch before blending, the one with too much kale, which is as close as I can get to writing down a recipe for a smoothie. But if you want a real recipe with real measurements, there's a ton out there within searching range, they've been very popular lately.
| green smoothie-too much kale in this one |
Labels:
breakfast,
fruit,
gluten free,
sneakyvegetables,
vegetables
11 June 2011
Fresh Fruit/Mint Juice
In our journey across the continent, we stopped and had dinner with some family at Cafe Rio and even though I don't usually go for big box chain fast food establishments, this one is different. But I'm not going to tell you about the amazing food. I'm going to tell you about these drinks they had. They were special limeades, there was mint limeade (everyone's favorite), strawberry limeade, and hibiscus limeade (my other favorite, so amazing!) And tonight we decided to make our own. We made strawberry peach mint limeade. It was delicious. I might just do mint and peach together next time, with just enough lime juice to keep the peaches from turning brown.
As far as I can tell you can use pretty much any fruit you like. You blend up the fruit with lime juice, water, a little ice, and add sugar to taste. And then you make more because everyone will need refills!
09 May 2011
Try Something New Today
| whole cheremoya |
| inside of cheremoya |
This is a cheremoya, or custard apple. It is a weird tropical fruit from Ecuador/Peru/Chile, with a scaly looking pattern on the skin. There is a small store near where we live right now that always has interesting produce, and this was my latest acquisition. Lovemuffin enjoyed it, but the flavor is a little too weird for me. To me it tastes a lot like lychees, which I also don't care for, too floral, but my "Field Guide to Produce" says that the flavor is a combination of pineapple, papaya and banana. It has a couple of close relatives with similar flavors, the sweetsop, soursop and atemoya. If you are going to cut up a cheremoya to serve later, you will want to sprinkle it with lemon juice to keep it from turning brown. The Field Guide to Produce recommends freezing the fruit and eating it like ice cream, either just the plain fruit, cut up, or blended with lime juice and honey to make a sorbet. Maybe I'll try that this week, see if I like it better.
I hope this spring brings you lots of weird fruits as well as the courage to try them all.
| the inside naturally seperates into sections, some of them have seeds |
05 April 2011
A New Toy
Last week Motherdear sent me an awesome food dehydrator (Thank you thank you thank you!!!) so this weekend we made all sorts of things. We dried some fruit, made yogurt, and made a fruit and yogurt leather that was pretty good, but sort of weird. Lovemuffin says he is going to try to make jerky this week, and I would like to make yogurt covered granola as a snack.
Dried pineapple was the best, although strawberries were a close second, and blueberries were the other close second. We discovered that blueberries will dry just fine from frozen, which is great because we have discovered a really cheap source of frozen blueberries.
We are going to be making a lot of yogurt because we can make twice as much as the tub we usually buy for half the price, and it tastes so good! So fresh! And we use a lot of yogurt in our house, so it definitely won't go to waste. I was going to share with you a recipe for muffins that uses yogurt, but I tried it this morning and I apparently can't get it to rise correctly, so maybe later. In the meantime, here are some pictures to make you jealous.
Dried pineapple was the best, although strawberries were a close second, and blueberries were the other close second. We discovered that blueberries will dry just fine from frozen, which is great because we have discovered a really cheap source of frozen blueberries.
We are going to be making a lot of yogurt because we can make twice as much as the tub we usually buy for half the price, and it tastes so good! So fresh! And we use a lot of yogurt in our house, so it definitely won't go to waste. I was going to share with you a recipe for muffins that uses yogurt, but I tried it this morning and I apparently can't get it to rise correctly, so maybe later. In the meantime, here are some pictures to make you jealous.
| the beautiful Excalibur food dehydrator |
| Lovemuffin preparing the fruit/yogurt leather snack |
| delicious yogurt ready to be made into a delicious smoothie |
| Some of the dried fruits and snacks, we already ate a lot :) |
01 December 2010
More on Persimmons
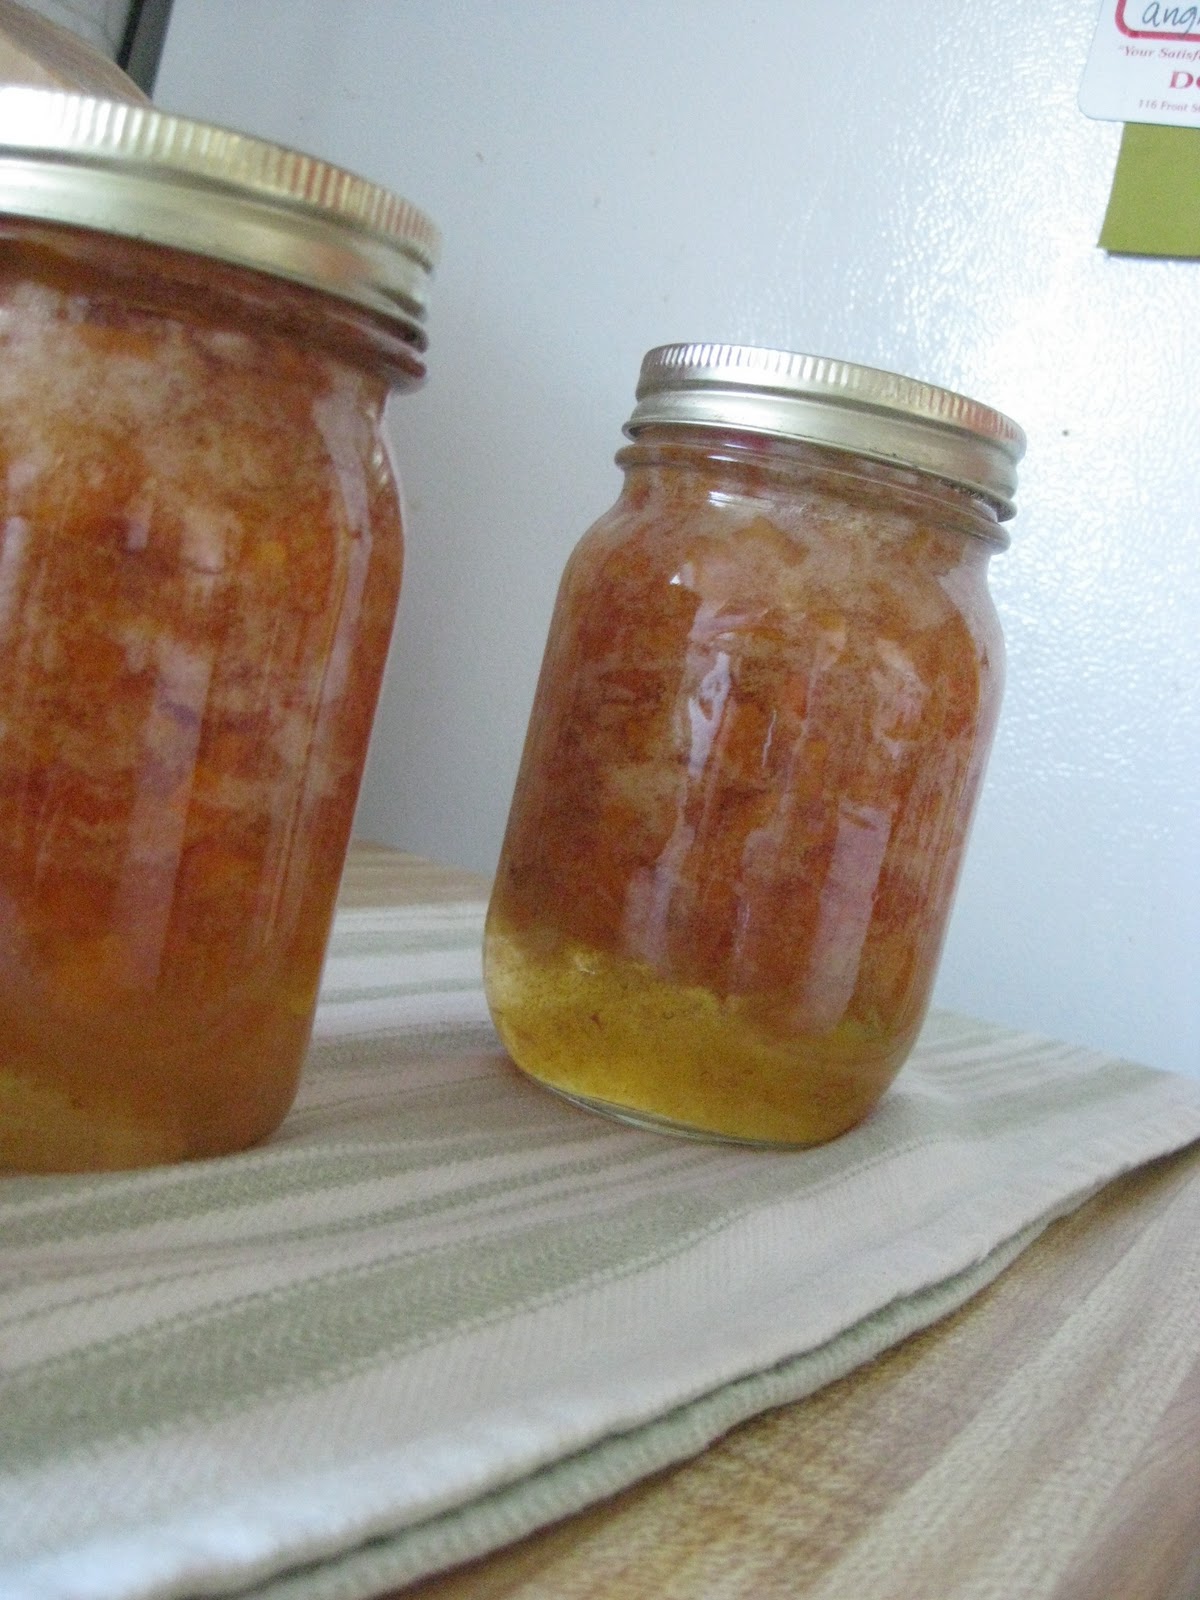
My attempt at persimmon jam was pretty unsuccessful. My one week's worth of experience with persimmons failed to prepare me for how much they would not act like other fruits that I have canned in the past. Here is what the jars looked like, and yes, I know I could turn them upside down to mix them together more, but I want you to see how little fruit there is compared to gelled sugar. Pretty much the whole bottom half is sugar/pectin.
Here are some things I learned from this experiment:
1) Use very very ripe persimmons---I used some that were quite firm still, but they should be mushy so that if the skin is punctured the innards want to come spilling out (what a description!) and you can easily peel and mash the innards with very little effort. If they aren't ripe enough the jam will not be juicy enough and you will have half of it be gelled sugar without any fruit to speak of in it, like mine. Also the flavor of the less ripe persimmons is quite delicate and cooks right away in the 5 or so minutes it takes to get the mixture cooked enough for the pectin to set up. This is really hard because for most fruits, if they are this ripe you throw them away because they are rotting. This is why it would be nice to have previous experience with persimmons, to know how they act at different stages of maturity.
2) Add a fair amount of something acidic-like lemon or lime juice, or even citric acid powder-because the persimmons themselves aren't acidic enough to preserve correctly without it. I used lime juice and a little zest, and at the end that was all I could taste in the jam. Next time I will do citric acid, I'll just have to figure out how much.
3) Start with one batch, don't commit to more than one until you have fine-tuned the recipe, or until I fine-tune it for you :)
Today I found some extra mushy persimmons at the market and I rushed home to taste them. They are a strange fruit, they taste delicious this way, but they have an extra weird texture. Kind of slippery, like raw fish. Now I understand why they are typically turned into pudding instead of eaten raw and fresh. The texture is just wrong for eating this way. But I saw a couple of recipes briefly at the library today, one for ice cream and one for quick bread, and a reference to a fresh persimmon pie, that sounds delightful. I think I'll be experimenting with these lovely mushy ones. The one on the right is not ripe yet, and I think you can see the difference. And you can see the insides, all shiny and soft.
10 November 2010
Persimmons and Privacy
Last night I had this terrible dream that someone had found old information including pictures of myself and my husband from years ago from this blog and from blogs of old friends and they started writing their own little blog, dissecting our home life based on very little evidence, and they somehow hacked into my account to put up links to it from this blog to make sure that I and everyone I know saw it. It was very distressing, I had a hard time getting to sleep again. I decided to take it as a warning, and now I will be using nicknames for myself and my husband and anyone else I know to protect the privacy of everyone. From now on, my husband will be called Lovemuffin (heehee!) and I will be called Pricklypear and if you want your own nickname, let me know (privately, of course) and we will go from there.
Now that the official business is out the way, I have to tell you how excited I am for these crazy fruits! I knew they existed, I think my Grandma made a persimmon pudding one time, but until 3 days ago I had never eaten a fresh persimmon. They are super cheap at a produce stand in downtown PG, so I bought about 10 pounds, and I'm going to do some experimenting. I'm thinking I'll make a persimmon pudding on Sunday to feed some guests that we'll be having over, and today I'll try to make some jam. Why is there a banana in this picture? I'm trying to get them to ripen faster, to make sure that they'll have the correct amount of natural pectin. I have never seen persimmon jam, I'm not sure if it's possible, but I found a few recipes online that seem interesting. I will let you know how it turns out.
20 October 2010
Crepe Party
I made some crepes the other night, my crepe pan is well seasoned now and I have the technique down, so it was kind of a party. The savory crepes for dinner were delightful and surprisingly filling. I used the recipe for blintzes from Mark Bittman's "How to Cook Everything Vegetarian" and they were very sturdy and hefty, as you can see in this picture. You can use any tried and true crepe or blintz recipe.
Savory Crepes For Dinner
1 onion, finely chopped
about 10 mushrooms, finely chopped
1 clove garlic, finely chopped
1 10 oz. package frozen spinach, thawed and drained
3-4 oz. mozzerella cheese, shredded or diced
2.5 oz. parmesan cheese
salt and pepper to taste
10-12 crepes or blintzes, already cooked
Saute onion, mushrooms and garlic till soft, let cool somewhat. Mix with well drained spinach, cheese and spices. Place about 1/4 cup of filling on the crepe and roll it up burrito style. Place all of the rolled crepes in a casserole pan in a 350 F oven for 10-15 minutes, until the cheese is melty, then serve. Or you can just keep the filling very hot when you prepare it and everyone can roll up their own.
And I made sweet crepes for dessert/breakfast the next day with cottage cheese and berries and a dash of sugar. You don't really need a recipe for this one.
Labels:
appetizers,
cheese,
cookbooks,
dessert,
fruit,
main dish,
mushrooms,
vegetables
04 September 2010
Jamming Time
Pears were on sale last week for really cheap, so we bought at least 30 pounds of pears and I made a lot of jam yesterday and today, and now I have a strange callous on my hand from paring so many pears. I did a bunch of pectin-free batches, and I did about 4 batches with the kind of pectin that uses less sugar. It all turned out well. The first couple of batches made with pectin set up really hard, I think because the pears were less ripe at first. I let them sit with a banana in a warm place for a day before doing the next ones with pectin. The pectin-free pear jam, unlike the pectin-free boysenberry jams I did a couple months ago, turned out a little more like syrup than jam, although some of the pectin-free jams set up more, depending again on the ripeness of the fruit. I was really excited to do some fun flavor combinations because pears are nice and mild and like being eaten with all sorts of spices. I have been planning on doing pear and ginger for a while, it's a combination that I experiment with every year during pear season (see my pear and ginger upside-down cake, recipe coming soon!). It is delicious, but the other combination I tried was even better: pear with cardamom. It is like heaven on a piece of toast, on a hotcake, mixed in with your oatmeal for breakfast, and probably warm over vanilla ice cream. I can't give you the recipe because I think I might start selling it. Yes, it is that good.
In the picture from left to right: Pear with cardamom and other spices, Pear with ginger and cardamom, Pear with ginger.
Labels:
cardamom,
experiments,
fruit,
ginger,
gluten free,
goodtimes,
jam,
pear,
seasonal,
vegan
20 August 2010
Fruity Yogurt: or some ideas for using the sweetened condensed milk you opened by mistake
A few days ago I needed some milk for a recipe, and didn't have any regular milk, so I went to my trusty pantry and opened a can of what I though was evaporated milk, so that I could dilute it to make it regular milk, but as soon as I opened it, I realized my mistake, it was sweetened condensed milk. So I dumped it into a jar and put it in the fridge and found a can of evaporated milk and went on to do my thing.
I had to think for a few days to figure out what to do, it would be such a shame to waste sweetened condensed milk, something I hardly ever buy. I though of making dulce de leche, but I'm afraid of explosions, and I don't know exactly what to do with dulce de leche. I remembered this thing we had from an asian bakery/cafe that was sort of like a slurpee, but it had chunks of mango with shaved ice and sweetened condensed milk drizzled over it, it was very yummy, but there were not any mangoes at the grocery store. And then this recipe that looks like Almond Joy candy bars caught my eye as well as this other candy, called brigadeiros, from Brazil, but both of them seem way to sweet for me to handle right now. I will probably still make the almond joy things sometime, but do them the same as I did my macaroons, with unsweetened coconut. And then I saw this recipe for vietnamese yogurt, and it is the solution to (almost) all of my problems. Lovemuffun and Pricklypear both eat a lot of yogurt, and I am always fighting with the Lovemuffin because he eats his with a ton of jam, the jam that I made all by myself, and then there is never enough jam or yogurt for me, which frusterates me. So, here's what I did:
Fruity Yogurt
1 Large tub of plain yogurt with no added weirdness (no gelatin or corn starch for thickening)
1 Bag of frozen fruit of your choice
Some sweetened condensed milk, to taste (I used about 1/4 of the can)
Drain the yogurt over a sieve lined with cloth or just a paper towel. Let it drain for several hours till the yogurt is nice and thick, like greek style yogurt. It is nice to have it thick because the fruit will add more fluid and this is an easy way to keep it from turning into drinking yogurt. Unless you want drinking yogurt, that is okay with me, this is a very flexible recipe. Thaw the frozen fruit while the yogurt is draining, then blend the fruit up a little, so that it is chunky, not too fluid. Add the fruit to the drained yogurt, and add sweetened condensed milk to taste. You could, of course, just sweeten your yogurt with sugar, but where is the fun in that? Also, I think that would make it runnier, because of the way sugar pulls the juice out of fruit.
This large batch will last us about 3 days and I like it so much more than the pre-fruited and sweetened yogurt at the store. You can make it the level of sweetness you desire, and you can be sure that there is real fruit in there, not just artificial colors and flavors. So far I have used blackberries and a fruit medly containing strawberries, blueberries and blackberries, and I still have plenty of sweetened condensed milk. Up next is peaches.
I had to think for a few days to figure out what to do, it would be such a shame to waste sweetened condensed milk, something I hardly ever buy. I though of making dulce de leche, but I'm afraid of explosions, and I don't know exactly what to do with dulce de leche. I remembered this thing we had from an asian bakery/cafe that was sort of like a slurpee, but it had chunks of mango with shaved ice and sweetened condensed milk drizzled over it, it was very yummy, but there were not any mangoes at the grocery store. And then this recipe that looks like Almond Joy candy bars caught my eye as well as this other candy, called brigadeiros, from Brazil, but both of them seem way to sweet for me to handle right now. I will probably still make the almond joy things sometime, but do them the same as I did my macaroons, with unsweetened coconut. And then I saw this recipe for vietnamese yogurt, and it is the solution to (almost) all of my problems. Lovemuffun and Pricklypear both eat a lot of yogurt, and I am always fighting with the Lovemuffin because he eats his with a ton of jam, the jam that I made all by myself, and then there is never enough jam or yogurt for me, which frusterates me. So, here's what I did:
Fruity Yogurt
1 Large tub of plain yogurt with no added weirdness (no gelatin or corn starch for thickening)
1 Bag of frozen fruit of your choice
Some sweetened condensed milk, to taste (I used about 1/4 of the can)
Drain the yogurt over a sieve lined with cloth or just a paper towel. Let it drain for several hours till the yogurt is nice and thick, like greek style yogurt. It is nice to have it thick because the fruit will add more fluid and this is an easy way to keep it from turning into drinking yogurt. Unless you want drinking yogurt, that is okay with me, this is a very flexible recipe. Thaw the frozen fruit while the yogurt is draining, then blend the fruit up a little, so that it is chunky, not too fluid. Add the fruit to the drained yogurt, and add sweetened condensed milk to taste. You could, of course, just sweeten your yogurt with sugar, but where is the fun in that? Also, I think that would make it runnier, because of the way sugar pulls the juice out of fruit.
This large batch will last us about 3 days and I like it so much more than the pre-fruited and sweetened yogurt at the store. You can make it the level of sweetness you desire, and you can be sure that there is real fruit in there, not just artificial colors and flavors. So far I have used blackberries and a fruit medly containing strawberries, blueberries and blackberries, and I still have plenty of sweetened condensed milk. Up next is peaches.
Labels:
breakfast,
experiments,
fruit,
gluten free,
mistake,
snack,
yogurt
01 July 2010
What do you do in the Summertime?
Pretty much every summer that I can remember my mom has made jam and I helped. Sometimes we find a great deal on some fruit, so we buy a ton and make jam like crazy for a day or two. It's great. Last year my mom and I picked apricots from Lovemuffin's grandma's tree, and we made seventeen batches of apricot jam. It was pretty incredible. We're still eating it. Lovemuffin's cousin also made a couple of batches, she tried a recipe that didn't call for pectin, so it needed less sugar and then you boil it for a long time so it's more like very thick syrup, but quite tasty, because it is fruitier. This year the fruit I got wasn't free, but I got a good deal because I picked my own. A couple of ladies from church and myself went up to the Gizdich Ranch in Watsonville to pick berries and it was great fun. I ended up with 19 pounds of boysenberries and about 5 pounds of olallieberries. By the way, when you say "olallieberries," it sounds like "lalaberries," even though Wikipedia says you pronounce it "oh-la-leh." Olallieberries are some sort of hybrid, you'll have to look at the little chart. Too complicated. Anyway, they make a good jam and a good pie, but they are a little tart for eating fresh, not quite like blackberries or raspberries, or even boysenberries. Those boysenberries on the bushes were so big and pretty, I just had to keep picking them, and the two women I was with helped, and that's how I ended up with 19 pounds.
When I got home that night I made two batches of jam the regular way, with the pectin and the whole lot of sugar, and then darling Lovemuffin saw how much sugar it was and thought we should try something different. Which was weird. He's never been one to be concerned about his sugar intake. I started looking up recipes for pectin free jam, and in my vast research (read, about half an hour of web surfing) I decided that I would try a small batch using one part fruit, and one part sugar, and a little lemon. And it worked really well! It set up well, it's nice and fruity, not too sweet, and you can do a pretty big batch all at once instead of having to do a lot of small batches over and over again. Which is kind of nice, but it's also nice to have small batches to process in the hot water bath, so that you can fit all of the jars in at the same time.
Here's what I did for my larger batch that worked really well:
Less Sugar Boysenberry Jam
11 cups mashed boysenberries
1 lemon, zest and juice
11 cups sugar
Place mashed berries and lemon zest and juice in a large pot, and bring to a gentle boil. Add sugar slowly, stirring with a very long handled wooden spoon. Bring it back to a full boil and let boil for 10-20 minutes, or longer if you aren't at sea level. The texture of the bubbles will change. If that makes sense. I took some videos, but I'm having a hard time posting them, there are some pictures that might give you the right idea, and I'll try to describe it. The bubbles become more caramelly and persistant. When the sugared fruit starts boiling, it looks pretty much like water at a full boil, and then when it is ready to set up, therer are more bubbles constantly, it is hard to tell when one pops and another takes its place.
Before:
After:
When the jam changes in this way, ladle it into clean jars, wipe the top and put on the lids and rings, and process in boiling water. I did mine for 10 minutes and the lids popped right as I took them out of the water. If you are at a higher altitude, process for longer. This batch set right up and I really like the texture of it without the pectin. The pectin-free jam made from berries seems different than the one from apricots, less like syrup and more like regular jam. Probably the berries have a lot more natural pectin in them than apricots. Another thing I have heard that you can try to make pectin-free jam is to use a quince in it, because quinces are supposed to have a huge amount of natural pectins. Maybe I'll try that sometime too. I have to say a big THANK YOU! to Lovemuffin's cousin, for introducing me to a new method of making jam. It's really fun to know that you can experiment with jam and it will still taste good, even if it doesn't set up exactly the same as it would if you follow exactly the recipe from the pectin boxes.
Subscribe to:
Posts (Atom)


